Website authority is basically an SEO concept that is used to represent a domain’s strength, credibility, and trustworthiness in the SERPs. It reflects how capable a site is of performing well in the search engine results based on different factors rather than relying on a single metric.
Although Google has never acknowledged website authority as a ranking factor, it is still widely used in the field of SEO. In fact, SEO experts often recommend auditing your site’s authority from time to time. This involves evaluating topical relevancy, domain authority, backlink profile, and many more.
When done right, auditing can provide you with a roadmap to improve rankings, improve user engagement, and build long-term trust.
So, in this blog post, we are going to break down how exactly you can audit your website authority like an SEO professional.
How to Audit Your Website Authority Like an SEO Expert
Here are the things you need to consider when auditing website authority.
1. Benchmark Topical Relevancy
The first thing you need to consider is topical relevancy. It helps determine how well your website demonstrates expertise in the targeted niche or industry. Google tends to prioritize websites that consistently publish relevant content for a specific audience, not those that offer unrelated information.
When reviewing topical relevancy, you must pay attention to these three elements:
- Content clusters
- Internal linking
- Keyword gap
Analyze whether your web content is well-organized into relevant topic clusters or not. A good cluster involves a pillar page (broad topic) supported by multiple related articles. Usually, it is said that a broad topic should have at least 8-12 interlinked blogs.
When it comes to internal links, these help search engine crawlers to discover relevant pages, ultimately strengthening the site’s topical authority. So, while auditing, you are required to check if articles contain enough internal links.
Finally, identify the keywords that your competitors are using to gain visibility, but you are not. Tools like Ahrefs offer dedicated features to perform keyword gap analysis.

The tool will help uncover missed opportunities within your content strategy, increasing the overall chances of rankings.
2. Review Backlink Profile
Backlinks are widely considered a strong ranking factor, but it is also true that not all links are created equal. A good backlink can take your website’s performance to new heights, while a bad one can do the opposite.
For this reason, it is considered essential to review the backlink profile when auditing your website’s authority. A good audit focuses on link quality, relevance, and diversity. Here are the things you need to watch out for:
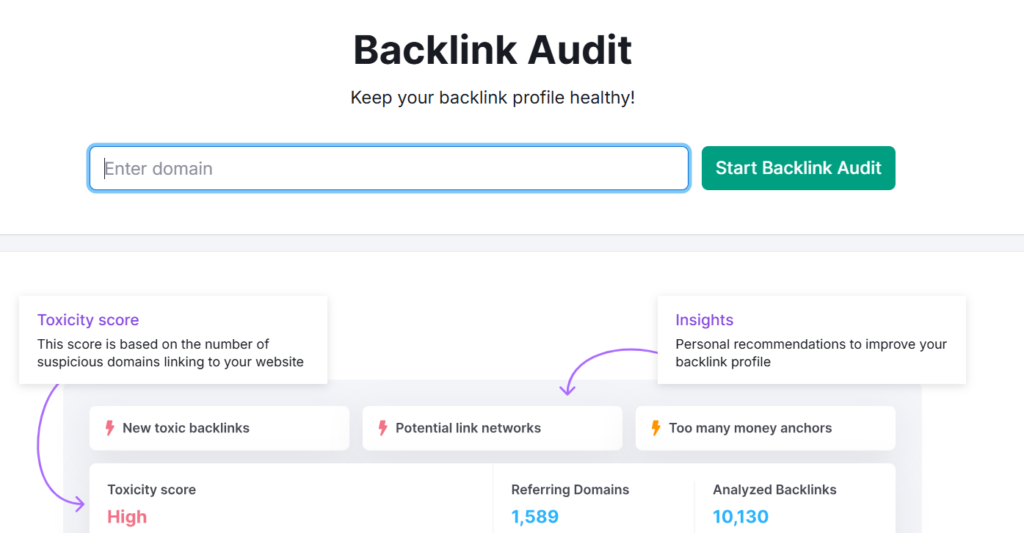
- First and foremost, determine how many unique websites are linking to your domain. A high number usually indicates a good profile.
- Analyze whether the linking websites are relevant to your target niche/industry. A single backlink from a relevant domain carries more weight and value than multiple ones coming from irrelevant sites.
- Also, pay attention to toxic or low-quality backlinks; these can cause serious harm to your site’s performance. Look for irrelevant domains, generic anchor text, and repetitive links from the same sites.
Now, the question is, how can you perform all these at once? The answer is to rely on specialized SEO tools such as Semrush. It will provide detailed insights into a website’s backlink profile, simplifying the auditing process.
Note that, while auditing, the quality of backlinks matters far more than the quantity.
3. Check for Domain Authority Score
Domain authority (DA) is a third-party SEO score ranging from 0 to 100. It simply predicts the ranking potential of a site in the SERPs. It is essential to note that domain authority is not officially recognized as a “Ranking Factor” by Google. Still, it is widely considered a useful metric for auditing site authority.
A high score indicates that the site is considered valuable and trustworthy. Whereas a low score means the site is either new or facing difficulties in winning the search engine’s trust.
Different DA score ranges are generally interpreted as:
- 1-20 (low)
- 20-40 (average)
- 50-60 (Good)
- 60+ (Excellent)
You can use DA Checker to quickly check the domain authority score of your website. It is free, simple to use, and can process multiple URLs at once. Simply enter the domain address, click the button, and review the results.
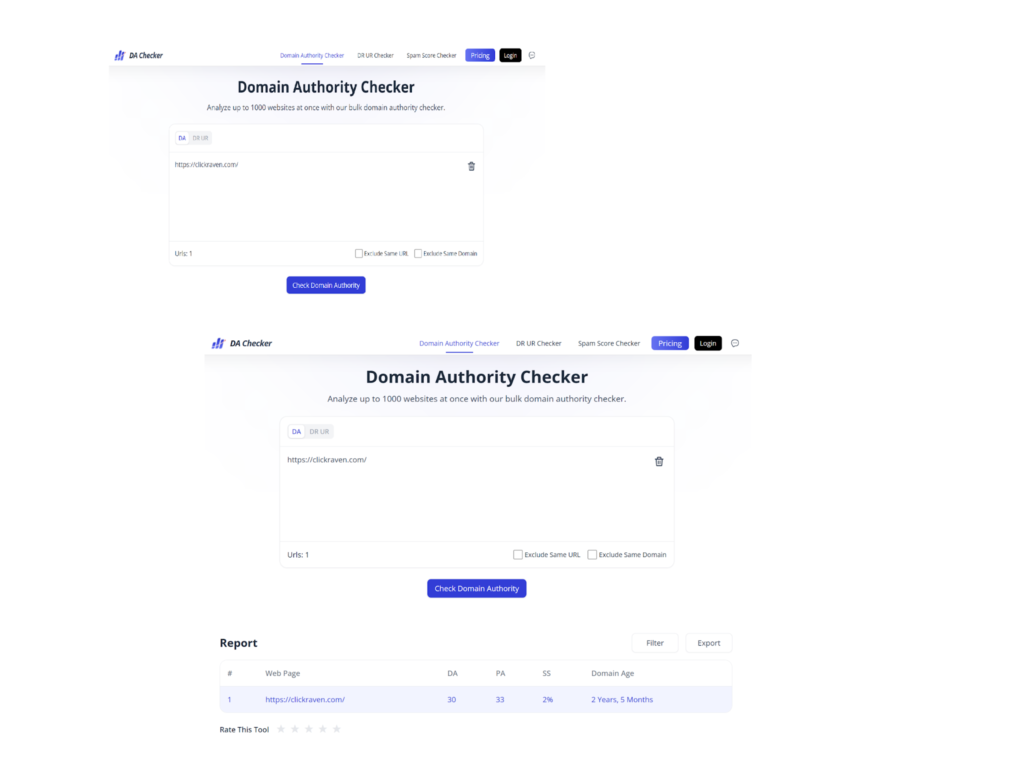
Instead of solely focusing on the DA score ranges mentioned above, it’s more useful to compare your score with that of your top competitors during the audit. This gives the number proper context. For example, a DA of 40 might be relatively strong in a low-competition niche, but the same score could be considered weak in a highly competitive space where leading sites have much higher authority.
4. Check for Trust Signals

Trust signals also play a key role in either making or breaking your site’s authority in SERPs. These help search engines understand whether your website is credible and trustworthy. So, when performing an audit, also consider these signals.
Below, we have listed some important trust signals:
- About Us and Author Pages: Check if your website is clearly demonstrating who you are, what you do, and who actually creates content for your blog/business site. This will add transparency and also build confidence among both the audience and the search engine.
- Editorial Standards: Also, review your editorial standards. A well-written, accurate, and up-to-date content significantly boosts a website’s authority.
- Social Proof: Check if you have added endorsements or validations from other brands or satisfied customers. These also indicate the domain’s credibility and authority in the targeted niche.
So, these are a few major factors that you should look for when auditing your website for authority like an SEO professional.
Wrapping Up
A PRO-level audit for website authority goes far beyond surface-level metrics (i.e., traffic, average position, etc.)
It involves reviewing your domain’s topical authority, backlink profile, trust signal, and much more. This blog post has explained all these essential factors in complete detail.
Hopefully, you will find the information valuable and interesting!