Digital safety starts with your website. Your online presence needs to protect visitors from hidden threats and data leaks. Making a site safe is part of building a professional image. You want people to feel comfortable when they browse your pages and click on your links.
Building trust means more than just having a nice design. You must build a secure environment for every user who clicks on your site. This keeps your audience coming back to see your new content. It helps you grow your business and your influence in a crowded digital space.
Building Trust With Secure Web Practices
Securing a site keeps visitors safe from hackers and scams that target private data. This protection helps you build a loyal audience by showing you care. You should prioritize these safety measures to keep your reputation clean.
Security helps you win the trust of your customers. Learning basic tips to prevent identity theft is a smart move for any internet user who spends time online. Online safety remains a priority for people who want to protect their credit scores.
Strong passwords and two-factor authentication are foundational steps for any site owner. These measures protect your backend from unauthorized access and reduce the risk of a breach that could expose your users’ data. Sharing this knowledge with your team ensures everyone plays a role in keeping the site secure.
Understanding Search Results And User Safety
Search engine rankings help people find your content without any trouble. You want to make sure the sites they find are actually safe to use. Quality content is better when the site is also secure. This balance is key to long-term success for any brand.
According to a recent study, search filters focus on trust since position alone does not tell the whole story about online risks. Trustworthiness is a primary factor in web traffic, and people often look for signs of safety before they enter any personal details on a site.
Reliable brands show up often in search results, and that consistent visibility builds a sense of security for new visitors. Focusing on these long-term goals strengthens your brand identity and signals credibility to both users and search engines.
Strengthening Brand Authority Online
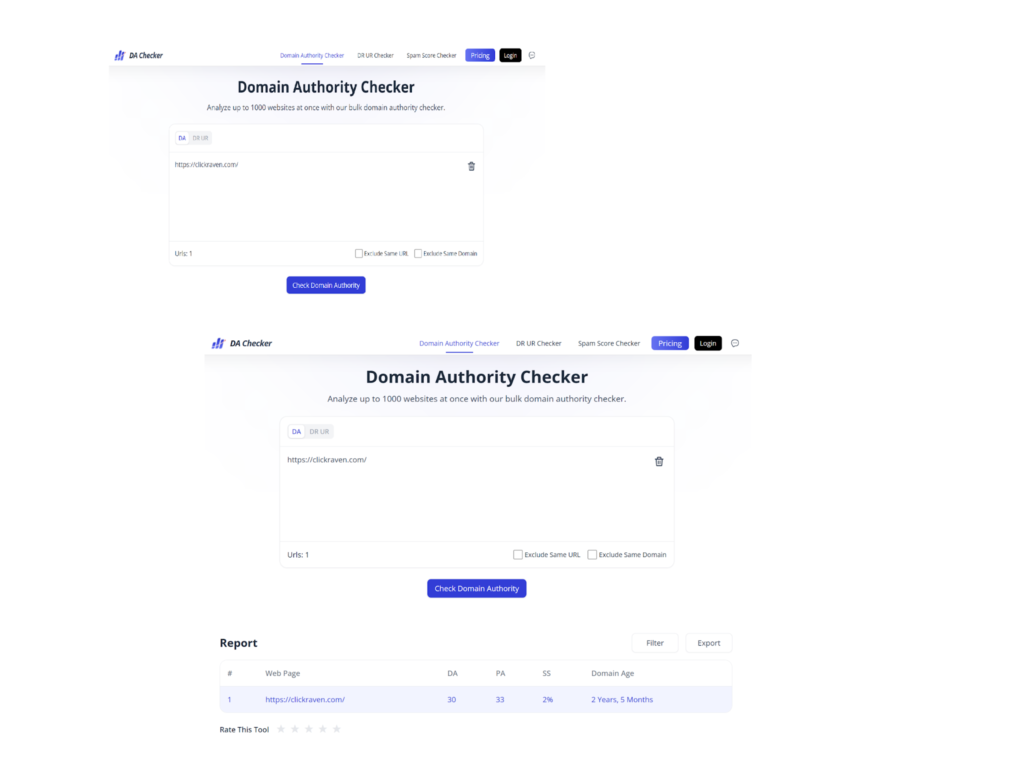
Ranking high requires more than just good articles. You need a technical foundation that search engines can read and trust. This foundation gives you an edge over your competitors and helps you stand out in your industry.
Using specific keywords and building quality links improves your brand’s authority online. You can also build this authority by creating valuable content that answers questions. Authority leads to higher rankings, which drives more traffic and ultimately better growth for your business.
Implementing Privacy Standards For E-Commerce
Collecting user data is a big responsibility for any site owner. You need to keep that data away from people who might steal it, especially on e-commerce platforms where customers share payment and personal details when they make a purchase.
Privacy is a key part of your professional reputation. Following privacy frameworks like GDPR and using dedicated privacy tools shows a genuine commitment to protecting your shoppers. These standards keep customer details private and protect your business from legal and reputational risk.
You should update your privacy policy regularly to reflect your current data practices. Clear policies help avoid confusion later and keep everyone on the same page.
Avoiding Common Pitfalls In Web Optimization
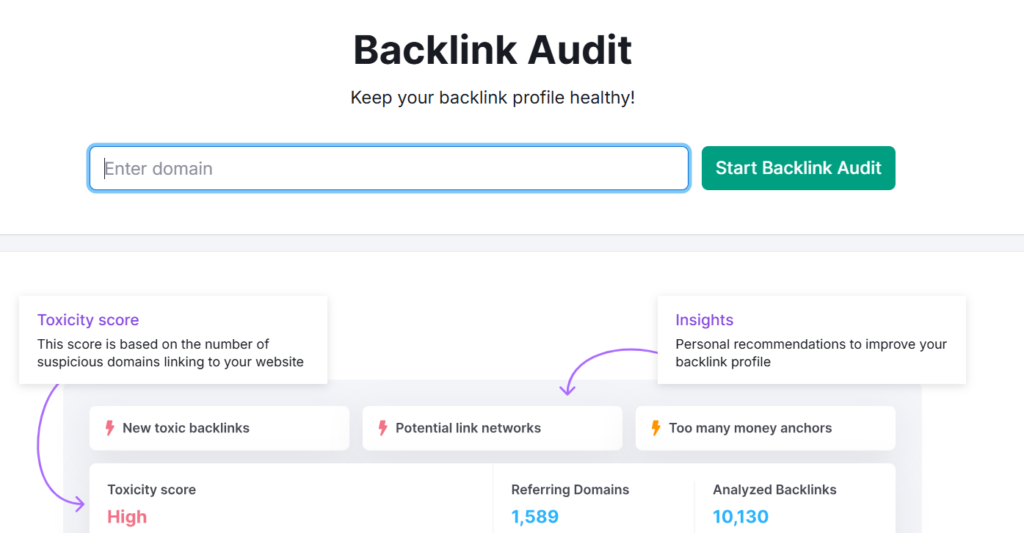
Some site owners try to cheat the system to get higher rankings. This creates risks for both the site and its visitors. Staying away from these practices protects your long-term reputation, helps maintain the business’s reputation score, and search standing.
- Spammy links can hurt your site
- Stolen content confuses search engines
- Hidden text can lead to penalties
- Poor security can lead to data theft
Honest strategies win in the long run. Focus on real value and clear information for your audience. You will see better results when you put your users first.
Speed And Performance For Mobile Users
Speed is a direct ranking factor and a key part of user experience. A fast site keeps people engaged with your brand. Slow loading times might increase your bounce rates which signals poor performance to search engines.
Keep your images small and your code clean. You can use free tools to test your site speed regularly. Small performance improvements can make a significant difference in both rankings and user experience.
Encrypted Connections And Site Security
A secure connection is a requirement for any modern website. A secure site gives users peace of mind as they browse your content and share links.
Encryption is a standard tool for web safety. Security certificates encrypt the data moving between a user and your server, preventing hackers from intercepting private information or payment details.
Search engines prefer sites that use encryption as a signal of quality and safety. You can obtain a security certificate at no cost, making it one of the easiest and most impactful steps you can take to protect your site and improve your standing in search results.
Creating Clear And Helpful Content
Your content should always be helpful and easy to read. Complex language can drive people away from your site. Clear writing helps people understand your message and your brand values.
- Write short, direct sentences
- Use simple, accessible language
- Break up long blocks of text with subheadings
- Add clear headers to guide readers through the page
Run AI-drafted text through an AI humanizer to keep it natural and easy to read.
When people understand your message, they are more likely to trust your brand and return to your site for more.
Website Visitors: Recognizing Scams And Fake Sites
Digital safety affects both website owners and regular users. As an internet user, awareness is your best defense against online scams that target your data.
Scammers often build fake sites that closely resemble real ones to trick people into giving away personal information.
As a user, protecting your identity online is a daily habit, not a one-time task. Staying alert and using trusted security tools gives you an extra layer of protection and keeps your personal data out of the wrong hands.
- Always check the URL carefully before entering a password or payment detail. Look for the padlock icon in your browser bar as a sign that the connection is encrypted and private.
- Protect your accounts with strong, unique passwords and enable two-factor authentication wherever possible.
- Stay cautious when clicking links in emails or advertisements, as these are common entry points for phishing attacks.
Conclusion
For website owners, digital identity is a valuable asset. Regularly check your security settings to stay ahead of new threats. New security tools come out every year. Staying updated is the best way to keep your site secure and your visitors happy.