A content marketing strategy in 2026 is a documented plan that defines your audience, topics, formats, channels, workflows, and KPIs to attract, engage, and convert customers with content. If you searched site:clickraven.com for “content marketing strategy,” this page consolidates our latest guidance, tools, and examples.
If you don’t have a content strategy, you can quickly create content haphazardly, with no idea what it’s supposed to achieve for your site. This guide shows exactly what to focus on, how to execute, and how to measure results.
Direct answer definitions and BLUF summaries for quick scanning
Step-by-step planning process with 12 concrete actions
Benchmarks, numeric targets, templates, and a comparison table
Internal resources across SEO, E‑E‑A‑T, ROI, and operations
2026 priority: document the strategy in 1–2 pages and operationalize it in a 90‑day calendar.
How we evaluated: We synthesized Click Raven playbooks, platform guidance from Ahrefs Keyword Explorer, Ahrefs Site Explorer, and SEMrush, along with common success patterns across B2B/B2C programs we track. Where external benchmarks vary, we present pragmatic ranges you can adapt to your niche.
Let’s get started.
What Is a Content Marketing Strategy?
A content marketing strategy is the blueprint that aligns your content with business goals by defining target audiences, topics, distribution channels, governance, and success metrics.
At minimum in 2026, your strategy should cover: audience/buyer personas, problem-to-solution topics, SEO/ABM approach, editorial standards, promotion plan, and analytics/KPIs.
Why Do You Need a Content Strategy for Your Website?
You need a strategy to focus resources, compound results, and avoid random acts of content that dilute ROI.
1) Boost your SEO
Developing a content marketing strategy allows you to boost your SEO by mapping topics to intent, prioritizing high‑value keywords, and publishing consistently.
Choose realistic keywords, create high‑value content, and distribute it across channels for compounding reach.
We recommend choosing high-volume, low-competition keywords, then building topic clusters that interlink for depth and authority.
Target 10–20 primary topics, each with 4–8 supporting articles, to establish topical authority in 90 days.
Using your content strategically can help convert your leads into paying customers by aligning assets to each stage of the sales process and removing friction.
If you can create content that appeals to your audience at different stages of a potential conversion process, you’re more likely to connect with them and close the final sale.
Create a 1:many asset per stage (awareness, consideration, decision) and a 1:1 asset for top opportunities each quarter.
3) Authoritativeness and E‑E‑A‑T
Strategy-driven publishing builds E‑E‑A‑T by demonstrating experience, expertise, authoritativeness, and trust across your site and profiles.
Collect feedback via surveys/comments and iterate content quarterly.
Publish at least 1 hands‑on guide and 1 proof‑based case study per month to demonstrate experience.
Here’s why developing an excellent content strategy is a good idea: it guides consistent SEO gains, improves sales enablement, and compounds authority over time.
What Information Do You Need Before You Develop a Content Strategy?
You need audience insights, performance baselines, and competitive intelligence before drafting the strategy.
a) Get to know your audience
Interview 5–10 customers, analyze search queries, and review social comments to define pains, jobs-to-be-done, and desired outcomes.
Document 2–3 primary personas and 1 emerging persona for 2026 experimentation.
b) Evaluate your current content
Audit your last 12–24 months of posts to identify winners, laggards, and gaps. Track traffic, engagement, conversions, and rankings.
What has worked well in the past, and what hasn’t? Which content generates more engagement and revenue for your website? Use this to select formats and topics for your next cycle.
Score each URL on a 1–5 scale for traffic, conversions, freshness, and E‑E‑A‑T; prioritize top 20% for updates.
c) Study the competition
Benchmark competitors’ topics, formats, and backlink profiles to find opportunities you can own.
Use Ahrefs Site Explorer to review competitor keywords/backlinks and SEMrush to cross‑validate SERP intent and content depth.
Identify 10 content gaps and 5 linkable assets you can create within 60 days.
4 Elements of a Good Content Marketing Strategy
A strong strategy clarifies your brand position, value proposition, business case, and execution plan.
1) Brand positioning
Define who you are, who you serve, and how you’re different, so your content sounds unmistakably like your brand.
What do we do and for whom?
What is our brand personality?
Which pain points do we solve?
What does the competitive landscape look like?
Treat your website like a focused brand within your niche. Strategy lays the path, then directs resources.
Model a 6–12 month runway; aim for content to influence 20–40% of pipeline touches.
4) Strategic plan
Translate goals into quarterly sprints with topic clusters, production cadence, and promotion plays.
For a fitness niche, for example, plan “weight loss,” “strength,” and “nutrition” clusters that guide readers to products and programs aligned to goals.
Adopt a 90‑day cadence: 12–24 posts, 4–8 updates, 12 email sends, and weekly social distribution.
Map content to AIDA—awareness, interest, desire, action—to reduce friction at each stage.
Awareness: problem discovery and category education
Interest: option comparison and early evaluation
Desire: outcomes, proof, ROI, and risk reduction
Action: pricing, setup, onboarding, and FAQs
By giving them the content they need when they need it, you can guide them to purchase decisions and referrals. You can strengthen that further with referral software such as Referral Rock, ReferralHero, or Friendbuy.
Create one flagship asset per stage for each core topic in the next 90 days.
2) Set your goals
Define 3–4 SMART goals that tie to traffic, engagement, leads/sales, and authority.
Match formats to audience preference and funnel stage—articles, comparison pages, calculators, videos, and email series.
Consider adding motion design from a video animation studio for complex concepts and product explainers.
Produce 2–4 long‑form posts, 1 comparison page, and 1 video per month to start.
8) Plan for your financial and human resources
Set a realistic budget and assign clear roles to avoid bottlenecks. Solo creators should sequence focus to avoid burnout; teams should right‑size velocity.
Start with 1 editor, 1–2 writers, and 1 distributor; add specialist roles as KPIs justify expansion.
9) Create a content calendar
Translate your plan into an editorial schedule with due dates, owners, and status.
Standardize on 1 research tool, 1 calendar, and 1 distribution tool to reduce switching costs.
Examples of Successful Content Strategies You Can Borrow for Your Website
Model proven strategies for SEO growth, sales enablement, and authority, then adapt to your audience and offers.
1) SEO and authority: Neil Patel
Neil Patel’s blog ranks broadly across SEO, analytics, and growth because it targets enduring demand and explains concepts in skimmable, proof‑backed posts.
Despite publishing over 4,785 posts, Neil emphasizes that more content does not always equal more traffic; focus on meaningful keywords and quality execution.
His article on blog quality shows that more than half of posts may generate zero visits per month, reinforcing the case for strategy and selectivity.
Consolidate low‑performers and strengthen winners to improve sitewide averages.
2) Sales enablement: Mailchimp
Mailchimp integrates education with product guidance so readers can act immediately, e.g., their comprehensive ecommerce website guide that naturally introduces their builder.
By mapping how‑to content to platform capabilities, they reduce the distance from learning to doing—and to signing up. At the same time, comparisons with better alternatives to Mailchimp often encourage businesses to evaluate which platform best fits their marketing goals, automation needs, and budget.
Embed contextual CTAs within guides that match the reader’s stage and task.
3) Authoritativeness: Dyson
Dyson’s Instagram showcases product features with data, making the case for performance visually and succinctly. Their “My Dyson” hub personalizes manuals, maintenance, and support.
This mix of education and post‑purchase guidance builds trust and long‑term engagement.
Pair feature education with ownership support to turn buyers into advocates.
FAQ: Content Marketing Strategy (2026)
Direct answers to the most common questions teams ask this year.
What is a content marketing strategy in 2026?
It’s a documented, 90‑day operational plan that links audience problems to solution content across SEO/ABM, with clear KPIs, a calendar, and distribution plays.
How long does it take to see results?
For new sites, expect 3–6 months to establish baseline rankings and 6–12 months for compounding growth, depending on niche competitiveness and publishing velocity.
How much budget should we allocate?
Start with a range that supports 4–8 quality posts per month plus distribution. Many teams use 5–15% of marketing budget, then scale with ROI.
Which is better for research: Ahrefs or SEMrush?
Both are strong. Use Ahrefs for robust backlink/top‑page insights and SEMrush for SERP/intent views; many teams cross‑reference for critical decisions.
Do we need backlinks to rank?
Backlinks help, but strong on‑page optimization and topical depth also move the needle. See how to rank without backlinks for practical tactics.
Track non‑brand organic sessions, rankings for target terms, engagement (time/scroll), conversions (leads/sales), and referring domains. Start with 6–8 KPIs. See our SEO KPIs guide.
Should we adopt ABM content if search volume is low?
Yes, for named‑account motions. Use intent data and personalization (see advanced ABM tactics) alongside SEO to reach buyers where they are.
Re‑prioritize questions quarterly and turn high‑volume FAQs into pillar pages.
Conclusion
Developing a content strategy on your endless to‑do list may feel unnecessary, but a documented plan keeps you focused and accountable in 2026.
Poorly planned content marketing can end in tears when you realize you’ve spent time and energy on content that misses the mark. Build the 90‑day plan, align it to KPIs, and execute with discipline. While you publish, remember to measure, learn, and iterate—then scale what works across your best channels.
User-generated content marketing is like having your customers become enthusiastic ambassadors for your brand. It not only enhances brand loyalty but also significantly boosts brand awareness. When you share content created by your customers, it’s akin to receiving a free advertisement for your brand. It’s a powerful strategy that seamlessly complements your traditional content marketing efforts.
What Is User-Generated Content?
User-generated content is essentially from individuals who have engaged with your brand. These folks typically become familiar with your brand by purchasing your main product or service, or they might belong to your target audience.
Regarding user-generated content marketing, the idea is to share this content across your platforms. By doing so, you’re aiming to create a buzz around your brand and garner positive attention.
Why Do You Need User-Generated Content Marketing?
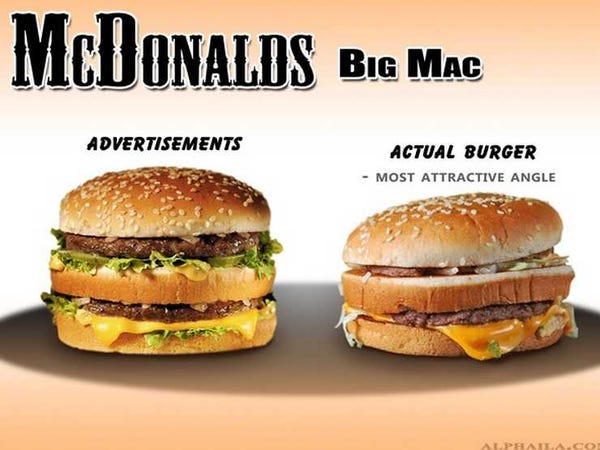
Why do content marketers need to add user-generated content marketing to our overflowing to-do lists? People don’t like or trust traditional advertisements. 7 in 10 people use advertising avoidance strategies such as ad blockers.
It’s true. Humanity has become very suspicious of advertisements that seem to promise heaven on earth. The Fyre Festival is only one of many reasons for this distrust.
In April 2017, Fyre Media co-founder Billy McFarland started selling people tickets to a once-in-a-lifetime experience – a luxury music festival set against the backdrop of a tropical island in the Bahamas.
An average of 5,000 people spent thousands of dollars on these tickets, which should include luxury accommodation for the festival’s duration.
These people arrived on the island excited to mingle and party with celebrities like Ja Rule and Kendall Jenner. They were astounded to find that all the A-list musical acts had dropped out of the festival. To make things worse, their five-star accommodation had transformed into dilapidated tents soaking wet from the rain.
Advertisements for the Fyre Festival had promised “a place where the tropical sun shines all day, and our celebrations ignite the night.”
Our burgers always look juicier on a billboard than on our plates. Our resorts look better in the photos on the website than in person. Red Bull promises to give us wings.
Unsurprisingly, people will trust what one of your customers says about your brand more than an advertisement from your brand. User-generated content marketing is seen as more authentic than traditional marketing. This is why your brand needs it.
User-generated content is a form of social proof for your brand. It helps you strengthen your relationship with current customers and reach a wider audience. A strong UGC Product Pitch can also help brands present real customer experiences in a more relatable and conversion-focused way
Here’s how sharing user-generated content can boost your brand:
1. It Is Authentic
User-generated content is created by people who don’t work for your brand. This content presents an authentic perspective on your for a potential customer because it is produced by someone just like them who has had first-hand experience with the brand. For this reason, people will trust your user-generated content marketing more than they will trust your traditional advertisements.
2. It Creates a Content Community
When you share content from one client, you encourage others to create similar content, making it easier for brands to find TikTok affiliates and other creators who genuinely enjoy advocating for your brand.
This results in a community of people , i.e. UGC creators who love and enjoy advocating for your brand. A content community is a source of valuable publicity for your brand.
3. It Generates Brand Loyalty
Speaking of content communities, user-generated content marketing also inspires brand loyalty. If you encourage people to share what they love about your brand, you will remain at the top of these clients’ minds. This increases the chances that they will return to you the next time they look for a similar product or service.
4. It Drives Sales
Sharing content created by people loyal to your brand boosts brand awareness. Ultimately, more brand awareness generates more sales.
User-generated content is an excellent place to find out what people love about your brand and what they don’t particularly enjoy. The feedback won’t always be positive, and that’s not bad. Instead, negative feedback is an opportunity to tweak what isn’t working for your clients, allowing you to build a product that they truly love.
Taking this feedback seriously will help your clients feel seen and heard. If your customers believe you value what they say, they will stay with you long.
Examples of User-Generated Content Marketing
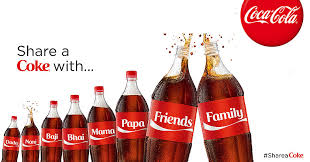
1) Coca-Cola’s “Share a Coke” Campaign
In 2011, Coca-Cola launched its “Share a Coke” campaign in Australia by printing people’s names on the sides of their bottles. Coca-Cola encouraged people to buy a friend a bottle with their name on it and share the Coke.
While the original campaign was launched in Australia, it became a multi-national campaign. Images of the Coke bottles were widely shared on social media, and the company tailored the campaign to each new culture. This approach allowed them to create a personalized campaign in each new country.
For example, in Israel, the company greeted people personally by name on giant billboards. Similarly, in China, nicknames were included among the original names.
With this campaign, Coca-Cola built a personal connection with consumers and spread some joy.
2) Aerie’s #Aeriereal Campaign
In 2014, American Eagle’s loungewear and lingerie line – Aerie – launched the #AerieREAL campaign to encourage women to appreciate their natural beauty. Since our adverts are filled with retouched photos of flawless women imposing unrealistic expectations on real women, this campaign is still relevant today.
With #AerieREAL, Aerie hopes to promote body positivity and confidence in women. This is a noble goal, especially in an industry with ridiculous beauty standards.
When Aerie launched this campaign, it also committed to stopping the editing of photos of its models. In addition, it encouraged its customers to post unedited images on social media with the accompanying hashtag “#AerieREAL.” Aerie donates 1 to the National Eating Disorders Association for each photo shared on social media.
In 2020, Aerie launched #AerieREAL Changemakers, a program that recognizes women who are helping their communities and changing the world. #AerieREAL Changemakers awards these fierce and inspiring entrepreneurs, advocates, and humanitarians $20,000 each to support their selfless projects. These women are now brand advocates for Aerie. Moreover, Aerie has gained publicity as a brand that cares about humanity.
3) Starbucks White Cup Contest
2014, Starbucks launched its white cup contest to build a deeper connection with its customers. They wanted to develop a new design for their cups and invited their customers to submit designs using the hashtag #whitecupcontest. These customers, who enjoyed drawing on their cups, were eager to participate.
The #whitecupcontest united Starbucks customers and encouraged them to achieve a common goal. This contest resulted in thousands of cup designs being shared on social media. In addition, Starbucks enjoyed more publicity and brand loyalty.
With the pandemic confining many people to their homes more than usual, brands are reaching out to reassure their clients. By keeping clients’ companies online, brands can create a sense of community during a trying time. Here are two brands that are doing this well:
4) Recreate a Piece of Art at the j.paul Getty Museum
When COVID hit back, the fact that the J.Paul Getty Museum had to close its doors didn’t stop them from engaging with the public. The museum called for people to recreate works of art while quarantined at home.
“We challenge you to recreate a work of art with objects (and people) in your home,” the museum tweeted. Contestants had to:
Choose their favorite work of art
Find objects and people in their homes
Recreate the piece of art
Share their creation on social media
Twitter users joined the fun and encouraged their families and friends to participate. The result was a series of exciting and amusing submissions and increased publicity for the museum.
To celebrate National Travel & Tourism Week 2020, Stevens Point Area invited the public to vote for the perfect way to spend a #StePoWknd. The campaign was designed to engage locals and former guests.
People submitted different must-haves for the perfect weekend. Stevens Point Area then used these submissions to curate the ideal weekend. The final perfect #StePoWknd was divided into drinks, food, and adventures.
With this campaign, Stevens Point excited their community about having a new adventure over the weekend. The public appreciated this excitement, especially given how isolated many people were at home.
If you ask your audience to submit user-generated content, you must be clear about what content you’d like them to offer. For example, the Starbucks white cup contest had a list of rules.
Even so, sometimes, your audience will post unexpected and unscripted content. This is good because the content someone posts spontaneously reflects your brand more authentically. So when this happens, enjoy the moment and share this content with the rest of your network.
2. Ask for Permission
Before you share user-generated content, it’s essential to ask the content creator for permission. By asking for permission, you show this person you respect them. Ultimately, clients who feel appreciated will speak highly about your brand.
3. Offer Something in Return
It’s not enough to ask for permission to use someone’s content. If you share someone’s content, offering them something in return is only fair. This person will appreciate feeling valued as a brand advocate. You can provide your content creators with branded gifts, event invitations, or discount vouchers for your core product or service.
User-generated content marketing can sound very technical and unfathomable at first. However, as you have seen, it’s pretty easy in practice. With the above tips, you can boost engagement with your current clients and increase brand awareness among potential clients.
Trust has become the cornerstone of online business success. With consumers increasingly cautious about where they spend their money, brands must demonstrate transparency, reliability, and authenticity. Content marketing plays a vital role in this process, offering businesses a way to connect with audiences through meaningful stories and valuable insights.
Why Content Marketing Builds Confidence
Content marketing is more than publishing blogs or social posts. It is about creating consistent, high‑quality material that educates, informs, and engages. When brands share knowledge openly, they position themselves as credible sources. This credibility gradually transforms into trust, which is essential for long‑term customer relationships.
Transparency Through Storytelling
Consumers are drawn to brands that share their journey. Storytelling allows businesses to highlight values, showcase customer experiences, and explain product choices. By weaving narratives into content, companies demonstrate that they are not just selling products but building relationships.
Sustainable Practices as a Trust Driver
Modern audiences care deeply about sustainability. When brands highlight their commitment to sustainable sourcing and production, they resonate with consumers who want their purchases to reflect responsible values. Content marketing provides the perfect platform to communicate these efforts clearly and consistently.
How Brands Can Follow Cullen Jewellery’s Example
At the centre of this discussion, it is worth noting how Cullen Jewellery exemplifies the role of content marketing in building trust.
By sharing stories about sustainable practices and showcasing collections that align with modern values, Cullen Jewellery demonstrates that transparency and responsibility are more than marketing buzzwords. Their approach shows other brands how storytelling can be used to highlight values, build credibility, and create meaningful connections with audiences. That is branding at its best. With a creative agency in Toronto like Bonus Track crafting compelling narratives, brands can build the trust and recognition that drive long-term success.
1. The Power of Educational Content
Educational content is one of the most effective ways to build trust. Tutorials, guides, and insights empower consumers to make informed decisions. When a brand invests in teaching rather than simply selling, it shows respect for its audience. This respect strengthens loyalty and positions the brand as a trusted advisor.
Examples of Educational Strategies
Blog guides explaining product care and selection.
Video storytelling that highlights craftsmanship and values.
Social media campaigns showcasing real customer experiences.
2. Consistency Across Platforms
Trust is fragile, and inconsistency can erode it quickly. Brands must ensure that their messaging, tone, and values remain aligned across websites, social media, and email campaigns. A unified voice reassures consumers that the brand is dependable and committed to its promises.
3. Building Emotional Connections
Beyond facts and figures, trust is also emotional. Content that resonates with personal values, aspirations, and lifestyles creates deeper bonds. When consumers feel understood, they are more likely to remain loyal and advocate for the brand.
Content Marketing as a Movement
Content marketing is no longer optional. It is a movement shaping how consumers perceive and engage with brands online. By focusing on transparency, sustainability, and education, businesses can foster trust that endures.
As you keep your skills sharp and stay competitive with the right content marketing books, sometimes, picking the right book from hundreds of books can be challenging. Which books will give you the right skills to boost your brand? Which books will cater to your industry?
Given the number of books, we’ve curated a list of the top 50 content marketing books for you to read in 2025. We know you’re always busy creating content, so you might not have time to read all 50. To simplify your life, we’ve separated these into 10 books and 40 that you can read to supplement the first 10.
Choosing the best books for your specific role will be challenging even with this list. For this reason, we’ve included a summary of each book, so you know what each has to offer.
Once you’ve brushed up on your skills with these content marketing books, give your content creation process a boost as well by signing up for Kontely. With Kontely, you and your team can create content faster and publish it to several channels simultaneously – all from one place. Join Kontely today and streamline your content workflow to collaborate while producing and publishing content faster for your clients.
10 Content Marketing Books That You Absolutely Must Read
The following 10 content marketing books have been chosen specifically because they are the most highly acclaimed books of the lot. The best content marketers write them and include revolutionary advice to boost your content marketing efforts.
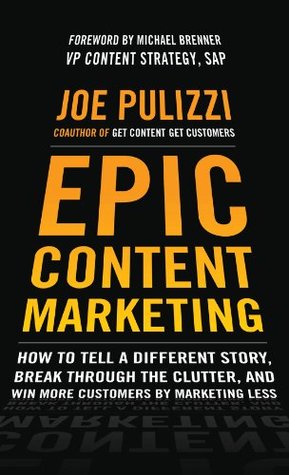
1) Epic Content Marketing: How to Tell a Different Story, Break Through the Clutter, and Win More Customers by Marketing Less
Author: Joe Pulizzi
In this book, Joe Pulizzi discusses creating content that will stand out in a digital space ruled by information overload and clutter. As one of the world’s leading content marketers, Pulizzi has developed a collection of tricks for capturing the attention of your target audience and inspiring action.
Why You Should Read It:
Why is this book #1 on our list of content marketing books? Today, people are wary of advertisements that promise the sun and the moon. They also don’t like being told what to do.
Because of this, it’s essential to connect with your target audience meaningfully. You need to be able to drive these people to a particular action in a way that inspires them rather than manipulates them into taking it.
If you want to build genuine connections with your customers, Epic Content Marketing is your book. In this book, Pulizzi guides you through what it takes to create content that entertains your audiences. Moreover, he includes case studies of how John Deere, LEGO, Coca-Cola, and other well-known brands have built outstanding content marketing campaigns.
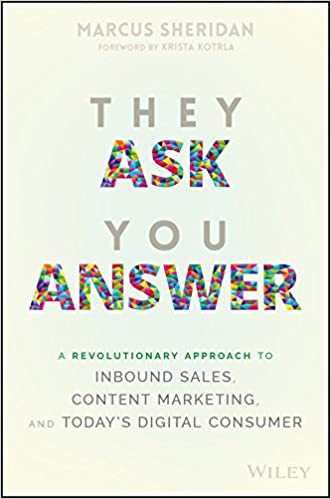
2) They Ask, You Answer: A Revolutionary Approach to Inbound Sales, Content Marketing, and Today’s Digital Customer
Author: Marcus Sheridan
In They Ask You Answer, Marcus Sheridan offers an ingenious approach to content marketing. Rather than focusing on selling to people, Sheridan believes we should answer their questions. As someone who transformed himself from a struggling entrepreneur to an inbound marketing guru, he knows about building client trust.
Why You Should Read It:
This book features in our top 10 content marketing books for good reason. Gone are the days when traditional ads, keyword stuffing, and link building were all you needed to reach your target audience. If these are the only tactics you rely on, your strategy will likely fall flat. Since so many people distrust traditional marketing these days, Sheridan’s book focuses on showing you how to create quality content that your target audience wants so that you can build trust with potential clients.
3) Everybody Writes: Your Go-To Guide to Creating Ridiculously Good Content
Author: Ann Handley
Ann Handley uses Everybody Writes with wit and insight to teach her readers how to create quality content that people will want to read. According to Handley, your words matter whether you build your brand website, interact with clients on social media, or draft marketing copy.
Why You Should Read It:
Out of all our content marketing books, this is the best one to help you write better. Since we’re all writers, there’s a lot we can learn from Handley. Words have immense power – they can differentiate between retaining customers and sending them running in the opposite direction.
Handley’s book is an enjoyable six-part course on creating content that will leave your readers wanting more. It’s divided into 1) How to Write Better, 2) Writing Rules, 3) Story Rules, 4) Publishing Rules, and 5) Things Marketers Write, and includes a list of content tools to help you produce outstanding content.
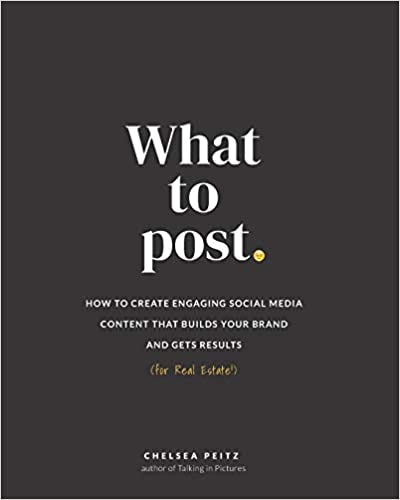
4) What to Post: How to Create Engaging Social Media Content that Builds Your Brand and Gets Results
Author: Chelsea Peitz
If you’re used to abandoning marketing guides halfway through, Chelsea Peitz’s book will surprise you with advice you can refer to repeatedly. Peitz covers everything you need to market your real estate business, from building a memorable brand to creating relatable content and boosting your reach.
Why You Should Read It:
What to Post is on our list of content marketing books because it will help you boost your social media presence. This book is for you if you don’t know what to post on social media to increase engagement and make genuine connections with your audience.
Filled with many relatable examples and actionable tips, What to Post will transform you from a social media novice to a social media guru. Peitz even includes some blank pages where she guides you through brainstorming sessions. While it’s written for real estate marketers, the tips in this book can be applied to any industry.
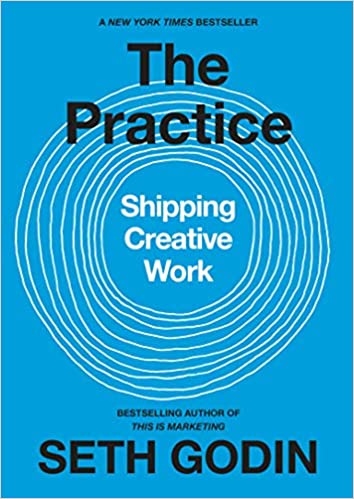
The Practice is the key to discovering the most creative version of yourself. In this book, Seth Godin busts several myths about creativity and productivity and consistently shows how to create quality content.
Why You Should Read It:
Seth Godin’s books will appear a few times on this list of content marketing books, and with good reason. As a content creator himself, Godin can teach us a lot about producing content that turns heads and leaves a lasting impression. If you often battle writer’s block or perfectionism, then this is just what you need to help you push through those moments when you feel uninspired.
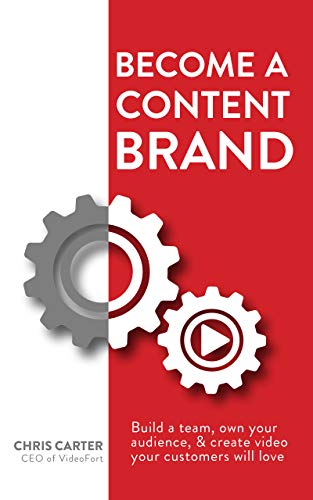
6) Become a Content Brand: Build a Team, Own your Audience, and Create Video your Customers will Love
Author: Chris Carter
Chris Carter has spent years helping 180 brands with content creation and building a network of over 150,000 creators, filmmakers, editors, and marketers worldwide. This experience has made him realize the growing demand for video and that no single brand can keep up with it. He wrote this book to help brands produce quality videos that can make a splash.
Why You Should Read It:
Out of all our content marketing books, this is the only one focusing specifically on videos. These days, we’re drowning in new content from brands every day. Instead of struggling with this constant flood of content, Carter shows you how to create quality content that will stand out from your competition. Do you want to learn how to create genuinely memorable videos? Then this is the book for you.
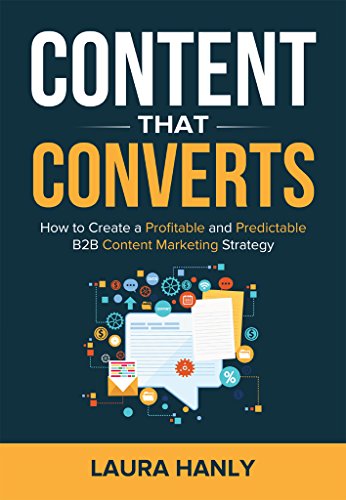
7) Content that Converts: How to Create a Profitable and Predictable B2B Content Marketing Strategy
Author: Laura Hanly
Laura Hanly taps into her experience to show people how to use content marketing to generate a predictable stream of qualified leads. Her methods have yielded positive results and are easily replicable by any brand.
Why You Should Read It:
Do you need help attracting more leads to your brand and converting these leads into paying customers? Then it’s good that Content that Converts is on our list of content marketing books because this is the book for you.
Hanly covers everything from establishing the right target audience to creating quality content to establish you as a thought leader in your industry. Rather than recycling tips from other content marketing gurus, Hanly fills her book with strategies that have worked for her campaigns.
Inspired by years of qualitative research and interviews with leading brands, Rebecca Lieb’s book is written to help you produce engaging social media content. Written by an industry thought leader, the content covered in this book should help anyone build a comprehensive content marketing strategy.
Why You Should Read It:
Lieb’s book is just what you need to create an integrated marketing strategy. This comprehensive book is why it’s in our top 10 content marketing books. By backing her ideas up with examples, graphs, and case studies, Lieb has created a foolproof guide to building a content-centric brand. To create a memorable brand that thrives on quality content, you must get a copy of this book ASAP.
Where You Can Find It:
Buy your copy of Content: The Atomic Particle of Marketing here.
9) The Lead Machine: The Small Business Guide to Digital Marketing
Author: Rich Brooks
In this book, Rich Brooks shares his digital marketing secrets. Brooks has tips for digital marketers of every level, from teaching brands how to rank higher on Google to showing content creators how to generate higher engagement on social media.
Why You Should Read It:
If you own a small to medium-sized business and are keen on it and generating leads, this book will help you meet those challenges head-on. With a combination of humor and insightful advice, Brooks enables you to build a website, attract the right people, and convert these leads into sales.
10) Superfans: The Easy Way to Stand Out, Grow Your Tribe, and Build a Successful Business
Author: Pat Flynn
In a world where people constantly chase likes and followers, Pat Flynn uses this book to remind us that a small, engaged audience is better than a sizeable, apathetic audience. His book is a series of tips and tricks to help you engage with your audience and turn them into superfans.
Why You Should Read It:
This book scored a place in our top 10 content marketing books because it will help you dramatically transform your social media strategy. Your regular audience members will like your social media pages and maybe even buy a product or two here and there.
Even so, the audience members who feel seen and heard will genuinely become your brand ambassadors. These people will tell their friends and family about you and share positive reviews online. They will also send you encouraging messages during a low-peak season and share your social media posts with their online network. We know you want to turn your target audience into superfans (who wouldn’t?), so this one is definitely for you.
As we’ve already said, our 10 most highly recommended content marketing books are above. If you don’t have time to read all 50 books on our list, you should at least read these 10.
More Content Marketing Books for Your Bookshelf:
In addition to the 10 content marketing books you must read, here are more to supplement your reading.
11) Clout: The Art and Science of Influential Web Content
Author: Coleen Jones
In this book, Coleen Jones demonstrates how to create content that converts using 8 principles of influence. According to Jones, using fancy technology and designing pretty content is insufficient to convert your leads into sales.
Why You Should Read It:
As a content creator, it is easy to focus on producing aesthetically pleasing content and using the newest technology to wow your audience.
However, Jones forces us to pause and understand why content is crucial to consumers and how to create content that meets their needs. This book will help you make the content your audience craves, thus creating a genuine connection with them.
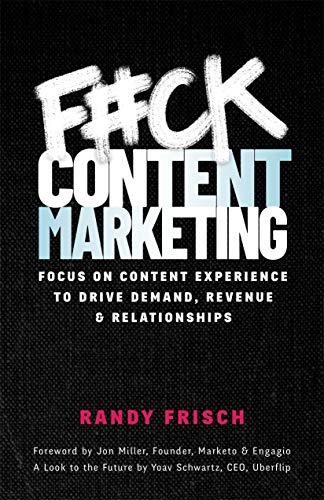
12) F*ck Content Marketing: Focus on Content Experience to Drive Demand, Revenue & Relationships
Author: Randy Frisch
Randy Frisch believes the most successful brands worldwide don’t simply do content marketing. Instead, they focus on creating content experiences—imagine the immersive scrolling experience created by Netflix, Spotify, and Instagram.
Why You Should Read It:
Do you want your consumers to feel like you’re speaking directly to them in all your content marketing? Do you want them to forget where reality ends and your marketing begins?
If so, this is the book for you. Frisch designed it to teach content marketers how to use the Content Experience Framework to create personalized content that drives product demand and builds client relationships.
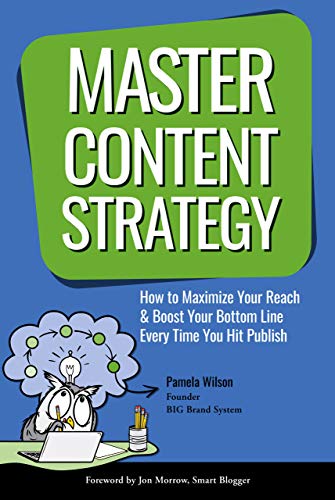
13) Master Content Strategy: How to Maximize your Reach & Boost your Bottom Line Every Time you Hit Publish
Author: Pamela Wilson
Instead of producing endless low-quality content, Pamela Wilson teaches us how to create the best content for each growth stage. As a business owner, marketing consultant, and thought leader, Wilson has practical tips that can be applied in both a B2B and a B2C setting.
Why You Should Read It:
This book, by Pamela Wilson, will guide you through the different stages of creating precious content for your audience. What makes this book stand out from the rest is that it will teach you how the needs of your newly launched blog will change as it ages. Instead of offering cookie-cutter advice, this book will grow with you and your business.
14) Brand Identity Breakthrough: How to Craft Your Company’s Unique Story to Make Your Products Irresistible
Author: Gregory V. Diehl
Gregory V. Diehl believes that every brand has a unique story to tell. Moreover, you carve out a more specialized niche in your industry with every new product. Diehl is passionate about helping content marketers combine these elements to build a standout brand identity.
Why You Should Read It:
The lessons in this book will help you build a brand that your clients can trust and tell your brand story to the world in a memorable way.
Diehl will show you how to be personable enough on your website, social media, and content to create a genuine relationship with your leads. Your brand could benefit from this book since sales follow only once this relationship happens.
15) Faster, Smarter, Louder: Master Attention in a Noisy Digital Market
Authors: Aaron Agius & Gián Clancey
In this book, Aaron Agius and Gián Clancey share secrets that helped them transform their two-person agency into a global leader in digital marketing. It is filled with tips to help you cut through the noise and information overload and build a more visible, long-lasting, and louder brand.
Why You Should Read It:
This book doesn’t simply present a list of successful marketing strategies. Agius and Clancey go beyond that to explain why these strategies were successful.
This approach makes it easy for content marketers to adapt the recommended methods to their brand. With actionable how-tos and step-by-step instructions, this book is an excellent blueprint for anyone committed to excelling with their digital marketing.
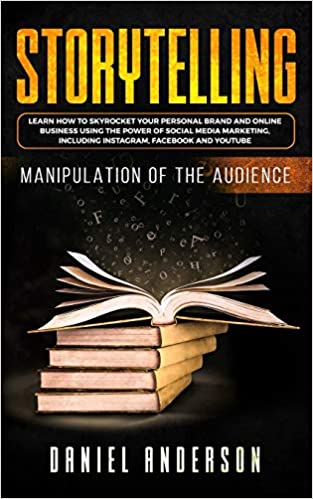
Daniel Anderson believes well-crafted stories build trust among your target audience and inspire action. His book contains tips and tricks for telling stories that will excite them about your brand.
Why You Should Read It:
Telling good stories can help you connect emotionally with your audience. If you want emotionally invested customers in your brand, you must pick up a copy of this book. Once you start using your content to tell powerful stories, your content marketing strategy will be more effective.
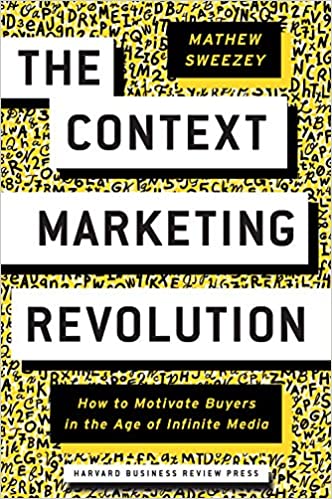
17) The Context Marketing Revolution: How to Motivate Buyers in the Age of Infinite Media
Author: Mathew Sweezey
In this book, Mathew Sweezey describes our unique digital landscape where – for the first time – our customers have the power to create content themselves. He goes one step further to talk about going beyond traditional marketing strategies to break through the noise and reach these customers.
Why You Should Read It:
Traditional marketing won’t cut it in a world where everyone with a smartphone is a content creator. Your traditional ads are more likely to be a bore or an annoyance to the people you’re trying to reach.
This book will arm you with strategies to break through information overload and reach your target audience. Context is important—helping your customers meet a need in the moment. Once you realize that, you’ll produce the content your audience has always wanted.
Where You Can Find It:
Buy your copy of Context Marketing Revolution here.
18) Effective SEO and Content Marketing: The Ultimate Guide for Maximizing Free Web Traffic
Author: Nicholas Papagiannis
Since people assume content marketing is simply about producing quality content, SEO is an underrated part of content marketing. Papagiannis shows how optimizing your content can increase brand awareness and drive more people to your website.
Why You Should Read It:
This will be a good read if you need help understanding SEO—from the basics to how to implement an effective SEO strategy. Many people assume that SEO only applies to their website or blog.
On the contrary, SEO is just as important on your social media channels, and Nicholas Papagiannis can show you exactly how to optimize these platforms.
Where You Can Find It:
Buy your copy of Effective SEO and Content Marketing here.
19) The One-Page Content Marketing Blueprint: Launch a Content Marketing Strategy in 90 Days and Double your Inbound Traffic, Leads and Sales
Author: Prafull Sharma
This book will offer an eagle-eye view of how content marketing works, including what to expect at each step of the journey. This is a comprehensive guide on how all the elements of content marketing come together to build a strategy that works.
Why You Should Read It:
A Google search on “content marketing” will leave you overwhelmed and drowning in tips, strategies, and advice from different people. These results are often conflicting, and very rarely will one result give you an idea of how all the various parts of content marketing fit together. If you know the feeling, you will appreciate Prafull Sharma’s guide on building a content marketing strategy, piece by piece.
Where You Can Find It:
Buy your copy of The One-Page Content Marketing Blueprinthere.
20) Marketing Rebellion: The Most Human Company Wins
Author: Mark Schaefer
Today, technology makes it easy for our customers to share recommendations with friends and family. As a result, most marketing happens without brands even getting involved.
The consumer is the new marketer. Schaefer uses this book to show us how to be part of these conversations by appealing to the people initiating them.
Why You Should Read It:
This book will challenge your understanding of being an marketer and show you how to build genuine connections with your consumers.
Today, the most prominent brands succeed because they can create human impressions that help customers believe, belong, and find meaning.
Don’t be left behind. With the right strategy, you can join your consumers’ conversations and arm them with the information and passion they need to be your brand ambassadors. If you’d like to do this for your brand, you must get your hands on this book and join the marketing rebellion.
21) The Content Fuel Framework: How to Generate Unlimited Story Ideas
Author: Melanie Deziel
In this book, professional journalist and award-winning marketer Melanie Deziel shows you how to consistently produce engaging content. Her framework will give your brainstorming sessions the boost they need, helping you generate new ideas effortlessly.
Why You Should Read It:
Even the best content creators suffer from writer’s block or brain fog occasionally. With this book, you can forget about wondering what to post on your social media or waiting for that “big idea” to boost your content.
The Content Fuel Framework is designed to help storytellers in any industry develop fresh, unique ideas anytime and anywhere.
22) Pre-suasion: A Revolutionary Way to Influence and Persuade
Author: Robert Cialdini
According to this New York Times and Wall Street Journal bestseller, your message does not influence people and change their minds. Instead, the moment before you deliver your message has the most power to drive action.
Why You Should Read It:
Cialdini believes that optimal persuasion can only happen after sufficient pre-suasion. For this reason, his book focuses on preparing your audience to be receptive to your message before you even deliver it. If you want to understand how to use diversion to prepare your audience to say “yes” to your brand, this book will be your new best friend.
23) Content Inc: How Entrepreneurs Use Content to Build Massive Audiences and Create Radically Successful Businesses
Author: Joe Pulizzi
Our list of recommended content marketing books features a second book by Joe Pulizzi. As founder of the Content Marketing Institute, Joe Pulizzi has the credentials to teach us how to be better content marketers.
In this book, Pulizzi recommends reversing the traditional model where brands create a product first and then look for an audience. Instead, he suggests that brands create content, build an audience around that content, and then develop a product for that audience.
Why You Should Read It:
Building a product and trusting that you will find an audience for it is much easier said than done. Brands that do this gamble with their money and investors’ funds. You can never guarantee that there will be an audience for your product once you’ve developed it.
However, if you build an audience first and create content that encourages them to engage with you, you are more likely to make the product they want. Pulizzi shows you how to create content that excites your audience and sparks meaningful conversations.
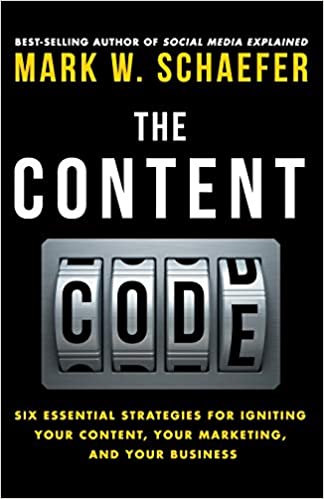
24) The Content Code: Six Essential Strategies for Igniting Your Content, Your Marketing, and Your Business
Author: Mark W. Schaefer
Mark Schaefer shares six digital secrets in The Content Code to help marketers master content promotion and distribution. He also teaches readers how to optimize their content for the web.
Why You Should Read It:
In a world where too many brands fight over a limited attention span, Mark Schaefer teaches these brands how to create content that encourages engagement.
Beyond simply generating engagement, Schaefer’s formula helps brands create content that will turn their audiences into fans who take over, driving their content to new places. This is a must-read if you want to make content your audience will be excited about.
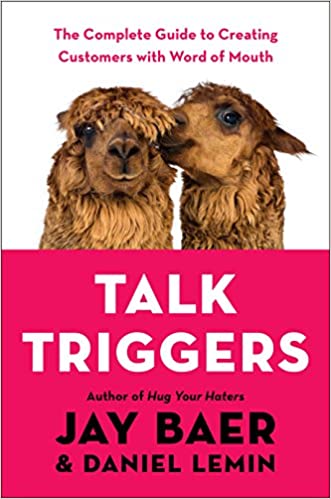
25) Talk Triggers: The Complete Guide to Creating Customers with Word of Mouth
Authors: Jae Baer & Daniel Lemin
According to marketing experts Baer and Lemin, word-of-mouth advertising is directly or indirectly responsible for 90% of all purchases. Their book is designed to teach brands how to reach people who love to talk and turn them into brand ambassadors – at no extra cost to the brand.
Why You Should Read It:
We all rely on word of mouth from friends and family to make buying decisions. Ironically enough, fewer than 1% of companies have built a strategy for inspiring customers to do word-of-mouth advertising for them.
Talk Triggers provides that strategy in a compelling, relevant, and timely book. This relatable strategy can be implemented immediately by any business.
Where You Can Find It:
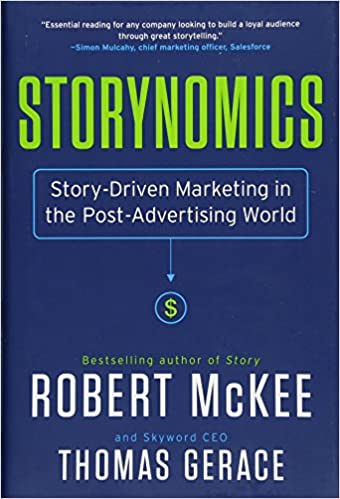
26) Storynomics: Story-Driven Marketing in a Post-Advertising World
In this book, Robert McKee partners with Skyword CEO Tom Gerace to create a formula for story-driven marketing. This solution is the perfect alternative to interruptive advertising, which our customers are fed up with.
Why You Should Read It:
People rarely click on pop-up ads anymore, so it’s time we found an alternative that works. Are you tired of annoying your target audience by jumping out at them and interrupting their browsing?
If so, this is the perfect read for you. Pick up a copy of this book and learn how to craft a brand story your target audience will naturally be drawn to.
27) Alchemy: The Dark Art and Curious Science of Creating Magic in Brands, Business, and Life
Author: Rory Sutherland
In this book, Ogilvy advertising legend Rory Sutherland decodes human behavior and tells us how to create that magical formula to draw customers to our products. It is a treasure chest of the secrets to human decision-making.
Why You Should Read It:
Most human interactions involve marketing, even if it’s not apparent. Sutherland analyses human interactions – from the everyday to the weird – to explain why humans behave the way they do.
By examining human behavior on such a fundamental level, brands everywhere can learn to create content that appeals to the human mind.
28) Stories that Stick: How storytelling can Captivate Customers, Influence Audiences, and Transform your Business
Author: Kindra Hall
You already know storytelling’s power to help you connect with your audience and convert leads. But do you know the correct stories to tell? In Stories that Stick, Kindra Hall helps us decide which stories are worth telling and to whom.
Why You Should Read It:
Storytelling seems simple in theory, but crafting a story that your audience will genuinely connect with can be challenging. If you struggle to communicate with customers, build trust with investors, and inspire your audiences, then this is the solution you never knew you needed.
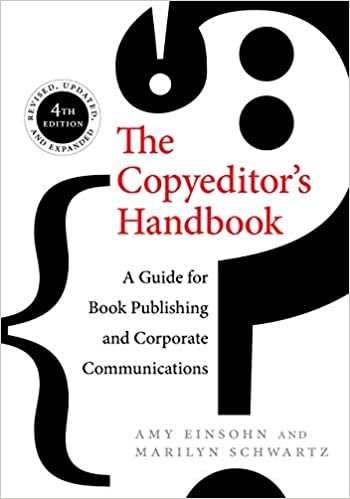
29) The Copyeditors Handbook: A Guide for Book Publishing and Corporate Communications
Authors: Amy Einsohn & Marilyn Schwartz
Schwartz and Einsohn have developed this guide for new and seasoned copyeditors looking to sharpen their skills. This workbook includes the latest advice from language authorities and recognizes shifts in 21st-century copyediting.
Why You Should Read It:
If you write for a living, then you need this book. Schwartz and Einsohn have thought of everything you could need, from help writing for a global audience to working with authors who write in English as a second language.
The writers have added a dash of humor and interesting anecdotes for language lovers, including a history of punctuation marks that weren’t cut.
30) The End of Marketing: Humanizing Your Brand in the Age of Social Media and AI
Author: Carlos Gil
This book helps brands navigate the murky waters of social media marketing, where a single influencer can quickly get more views a day than Apple. Carlos Gil explains how brands can stay relevant in a world where traditional marketing is dead.
Why You Should Read It:
Today’s consumers don’t want to be sold to. Instead, they want to be engaged by the brands clamoring for their attention. Building engagement should be a priority for every brand in this digital landscape. By buying this book, you’re putting the formula for generating positive engagement with your audience in your own hands.
31) Words that Change Minds: The 14 Patterns for Mastering the Language of Influence
Author: Shelle Rose Charvet
This book digs into the science of influence to teach readers how to use their words to persuade people without manipulating them. It’s perfect for sales, marketing, recruiting, negotiation, teaching, training, communication at work, and conflict resolution.
Why You Should Read It:
As a content marketer, everyone you talk to has a “communication wall” built around them. This wall is designed to keep out the big lousy marketer notorious for promising the sun and the moon but delivering a rock instead. If you want to get through to even the most stubborn of people, then you need to buy this book.
32) Building a Story Brand: Clarify Your Message So Customers Will Listen
Author: Donald Miller
Building a Story Brand is an excellent solution for entrepreneurs who struggle to talk about their brand to audiences. Donald Miller shares lessons on crafting the perfect message for your website, brochures, and social media.
Why You Should Read It:
Building a brand story that excites your audience is crucial to content marketing. Donald Miller’s book teaches you how to do this. By sharing the seven universal story points humans respond to and the real reason customers make purchases, Miller will transform how you talk about your brand.
In this book, Halvorson explains why content is integral to your marketing strategy and how to make it work for your brand. This book offers a refreshing break from content marketing books, which focus on design by putting the focus on quality content.
Why You Should Read It:
A beautiful website is great but means nothing without creative and engaging content. This book will teach you how to combine the aesthetics of your content with valuable information in a beautiful harmony that will appeal to your audience.
Don’t get stuck on beautiful designs while neglecting your content. Offer your target audience the best of both worlds, and they will stick with you.
Where You Can Find It:
Buy your copy of “Content Strategy for the Web” here.
34) Binge Marketing: The Best Scenario for Building Your Brand
Author: Carljin Postma
In this book, Carljin Postma takes us to the people who have turned capturing and retaining an audience’s attention into an art: Hollywood. Since Hollywood has been getting people hooked on engaging content for decades, this is an excellent place for content marketing advice.
Why You Should Read It:
As content marketers, we often make the mistake of looking at each piece of content as a separate piece. In Binge Marketing Postma, we are encouraged to think of each new piece of content as a new episode in a TV show.
Creating this kind of serial content fosters trust and builds genuine long-term relationships with your audience.
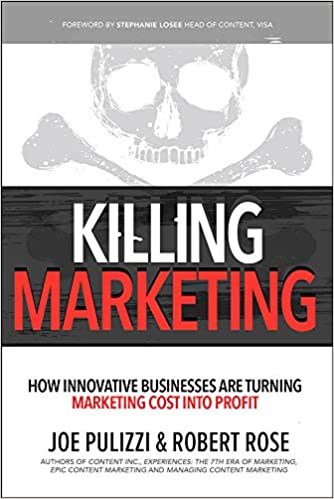
35) Killing Marketing: How Innovative Businesses are Turning Marketing Cost into Profit
Authors: Joe Pulizzi & Robert Rose
Pulizzi and Rose take us behind the scenes to innovative marketing departments worldwide, showing us how they are ending marketing as we know it. Their new marketing model is so successful because it focuses on consumer needs.
Why You Should Read It:
If you can create value for your consumers through your owned media and savvy content marketing, you will boost brand loyalty and reach wider audiences. This book will show you how to do that, helping you transform your from a cost center to a profit machine.
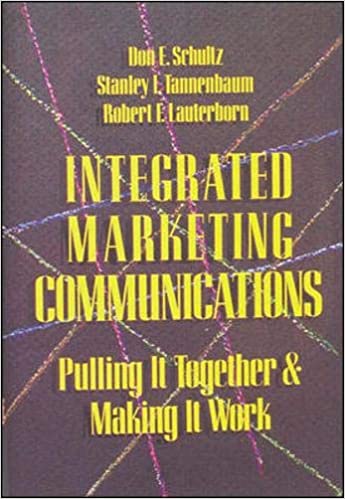
36) Integrated Marketing Communications: Putting it Together & Making It Work
Authors: Don E. Schultz, Stanley Tannenbaum & Robert E. Lauterborn
According to this book, your business formula can be replicated—except for your content marketing. Don E. Schultz and his colleagues are committed to helping brands produce outstanding content that meets the needs of their consumers.
Why You Should Read It:
You might have a fantastic product, but your content helps you build a unique brand image and stay top of mind among your target audience. If you want to create content that stands out, this book is just what you need.
Where You Can Find It:
Buy your copy of Integrated Marketing Communicationshere.
37) The Social Organism: A Radical Understanding of Social Media to Transform Your Business and Life
Authors: Oliver Luckett & Michael Casey
In this book, Luckett and Casey make a fascinating comparison between social media and the biology of an organism. They explain how we can use our social media content to take part in the evolution of information on these platforms.
Why You Should Read It:
Do you know how to create shareable content that can go viral? It might seem easy to see other brands doing it, but developing viral content takes time and understanding your audience.
This book shows you how to tap into your consumers’ social DNA and create content they will replicate and share with you repeatedly.
38) The Best Damn Web Marketing Checklist, Period!
Author: Stoney deGeyter
The title of this book speaks for itself—it’s the ultimate guide to boosting your digital marketing. Packed with website strategies, it will help you increase your web traffic and improve your web presence.
Why You Should Read It:
Designing an effective website isn’t simply about slapping pretty colors and leaving it at that. It’s essential to focus on elements that search engines and your target audience will love.
Stoney deGeyter’s checklist covers web marketing strategies for design considerations, site architecture, conversion optimization, website optimization (SEO), website advertising (pay-per-click or PPC), content writing, and social media strategy.
Where You Can Find It:
Buy your copy of The Best Damn Marketing Checklist, Period! Here.
39) Top of Mind: Use Content to Unleash Your Influence and Engage Those Who Matter to You
Author: John Hall
John Hall uses his experience to teach readers how to build content-driven relationships that keep your brand in mind among consumers. With the tips in this book, you can make a lasting influence on your target audience.
Why You Should Read It:
The most loyal customers see you as a trusted friend, and Hall teaches you how to build this relationship with your consumers.
Successful businesses do so well because they are the first brands that come to mind when customers think of a particular product. If you want to rise in the ranks and join these brands, then give Top of Mind a read.
40) Giftology: The Art and Science of Using Gifts to Cut Through the Noise, Increase Referrals, and Strengthen Retention
Author: John Ruhlin
If you’ve never considered using gift-giving to boost your brand and connect with potential clients and influencers, then the concepts in this book will surprise you. Ruhlin believes something as simple as a handwritten note could brighten someone’s day and seal a deal.
Why You Should Read It:
You might not have realized this before, but branded gifts can boost your content marketing efforts. The trick is to give your prospect a gift they need precisely when needed.
John Ruhlin teaches his readers how to master the art of gift-giving. You can boost brand awareness and build brand loyalty by learning to give thoughtful gifts.
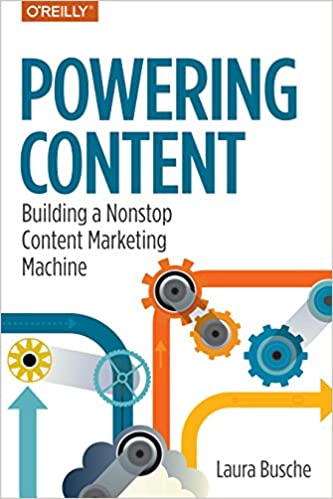
41) Powering Content: Building a Nonstop Content Marketing Machine
Author: Laura Busche
When your new product is ready to launch, you want to shout about it from the treetops. But how do you create content that will shout loud enough to be heard above the noise and clutter? Well, you can start by reading this book.
Why You Should Read It:
You might have developed the best product in the world, but your marketing efforts will fail if your audience isn’t excited about your brand.
With Busche’s guide, you can learn to create content your audience can relate to, speaking directly to your customers and inspiring them to take action.
42) Brand Now: How to Stand Out in a Crowded, Distracted World
Author: Nick Westergaard
With the rise of technology, sharing the good news about your product will be more accessible than ever. On the contrary, since smartphones have transformed everyone into a content creator, you must find creative ways to break through the clutter. You can start by creating a memorable brand.
Why You Should Read It:
In this book, Westergaard explains how to build a brand that resonates online and offline. Written with wit and insight, brand Now will teach you how to give your brand an unforgettable personality with which your target audience can connect.
43) Permission Marketing: Turning Strangers into Friends, and Friends into Customers
Author: Seth Godin
Seth Godin states, “Permission marketing is the privilege (not the right) of delivering anticipated, personal, and relevant messages to people who want to get them.” His book teaches brands how to create content that people will miss.
Why You Should Read It:
Imagine how good it would feel to be missed by a customer who picks up the phone or emails you are complaining that they didn’t get their newsletter this week.
Any brand would dream of creating content that is missed by its audience. Don’t let this opportunity pass you by. Pick up a copy of Permission Marketing and learn how to create content your clients cherish.
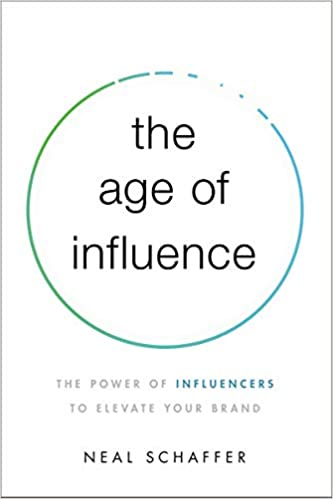
44) The Age of Influence: The Power of Influencers to Elevate Your Brand
Author: Neal Schaffer
In The Age of Influence, Neal Schaffer explains the elements needed to create an effective influencer marketing strategy for your brand. Schaffer, a social media expert, offers many tips and tricks to help you navigate today’s constantly evolving digital landscape.
Why You Should Read It:
Influencer marketing is an essential part of content marketing. Partnering with influencers helps you create content that your audience can relate to.
A good influencer marketing strategy will help you turn your audience into fans, subsequently turning these fans into influencers. If this sounds good, you must buy a copy of this book.
Jeremy Miller believes your brand name forms the foundation of your branding and content marketing efforts. With this book, you can create an unforgettable brand name that travels far and wide.
Why You Should Read It:
Your brand name is everything. It gives your brand a personality and helps your audience remember your core product or service.
Although many content marketing books focus on branding, this book will help you build a truly exceptional brand that people enjoy connecting with.
46) The Definitive Guide to Strategic Content Marketing: Perspectives, Issues, Challenges and Solutions
Authors: Justin Kirby & Lazar Džamić
This book collects advice from content marketing experts worldwide. A treasure chest of theories, tips, and tricks, The Definitive Guide to Strategic Content Marketing is designed to educate content marketers of all levels and abilities.
Why You Should Read It:
Are you curious about the theories that have made content marketing work so well for brands today? This book is just that, with examples from brands worldwide. Understanding how content marketing theories have shaped today’s marketing world will help you adapt these theories to your brand.
Where You Can Find It:
Buy your copy of The Definitive Guide to Strategic Content Marketing here.
47) One Million Followers: How I Built a Massive Social Following in 30 Days
Author: Brendan Kane
In One Million Followers, digital strategist and growth hacker Brendan Kane teaches readers how to go beyond building an engaged social media following to gain dedicated fans.
Why You Should Read It:
Do you want to create content that inspires your followers to do more than mindlessly click the ‘like’ button and scroll to the next thing? Would you like to publish content that stops people in their tracks and drives them to check your website and purchase your products?
If this is you, you should let Kane show you how in this book. Having built online platforms for A-listers, including Taylor Swift and Rihanna, he has what it takes to transform your social media presence.
48) Content Marketing for PR: How to Build Brand Visibility, Influence, and Trust in Today’s Social Age
Author: Trevor Young
Standing out from the competition and producing content that matters has become almost impossible today. Even so, with this guide, you can boost brand visibility and gain your audience’s trust.
Why You Should Read It:
As content marketers, we yearn to produce content that helps us break through the sea of voices crying out for attention. This is the only one of our 50 books that examines content marketing from a PR perspective.
This book combines influential content marketing and public relations theories to help you do just that. The right content marketing strategy is a series of good decisions you make for your brand. The first good decision you can make is to read this book.
Content marketing isn’t simply about producing brilliant content for your brand. You must also make sure this content is easy to find. Ward and French’s book shows us how to optimize our content for the web.
Why You Should Read It:
Your job as a content marketer doesn’t end when you’ve created unique content. To truly outshine your competitors, you must also ensure this content is visible on search engines. In The Ultimate Guide to Link Building, Eric Ward and Garrett French will show you how to make your audience happy while making Google happy.
Where You Can Find It:
Buy your copy of The Ultimate Guide to Link Buildinghere.
50) This is Marketing: You Can’t Be Seen Until you Learn to See
Author: Seth Godin
No, you’re not imagining things. Out of our list of 50 content marketing books, this is the third Seth Godin book we’ve recommended because he’s just that good. In another insightful book, Godin explains the importance of your audience in your content marketing efforts.
Why You Should Read It:
Many marketers make the mistake of using consumers to fulfill the brand’s needs instead of vice versa, which is how it should be. Seth Godin tells us, “You can’t be seen until you learn to see,” effectively saying that you must see your audience to produce valuable content.
Understanding your audience’s pain points is vital to this. With Godin’s content marketing tips, you can finally learn what it takes to produce content your audience values.
As you can see, there are many good content marketing books. If you want to brush up on your content marketing skills, the 50 books above are an excellent place to start. Alternatively, a good content marketing course could be just what you need.
Posting consistently is one of the biggest challenges for influencers today. Creating ideas is usually not the hard part; the real challenge is turning them into production. Filming, editing, adding captions, resizing videos, and posting across multiple platforms takes a lot of time.
TL;DR: Many creators are starting to use AI video tools. AI tools speed up editing, generate visuals faster, and turn one idea into multiple pieces of content.
Some of the AI Video platforms are making this easier by combining multiple AI video models and creator tools into one workflow.
Why Posting Consistently Gets Hard for Influencers
Audiences only see the finished video. They do not see the production process behind it. Producing a single short-form video often includes:
finding an idea
writing hooks
filming content
editing scenes
adding subtitles
exporting multiple versions
posting on different platforms
Doing these becomes difficult when creators post daily across different platforms like TikTok, Instagram Reels, and YouTube Shorts. Additionally, many creators work alone without editors or production teams. Over time, the workload creates burnout and slows content production.
This is why consistency is often difficult to maintain. The problem is rarely creativity; it is usually a lack of time.
How AI Video Tools Change the Creator Workflow
AI video tools reduce the gap between an idea and a finished video. They help reduce repetitive production work so creators can focus more on content direction and audience growth.
Instead of manually building every scene, creators can generate visuals using prompts, reference images, or existing footage.
This speeds up several parts of the workflow:
scene creation
B-roll generation
transitions and effects
captioning
video refinement
Faster Content Creation
The biggest benefit to using AI video tools is workflow efficiency.
Many creators now batch-produce content instead of creating videos one by one. For example, creators can generate multiple video concepts in a single session and refine them later.
Prompt reuse is another common strategy. Creators save successful prompts and modify them slightly for future videos. This helps maintain visual consistency while reducing editing time.
AI also improves speed during experimentation. Creators can quickly test different hooks, scene styles, transitions, visual pacing, and thumbnail concepts. This matters because short-form platforms reward experimentation. Creators who test more formats often learn faster.
Instead of spending hours creating every variation manually, AI reduces the production load significantly.
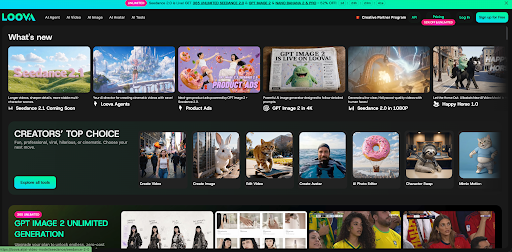
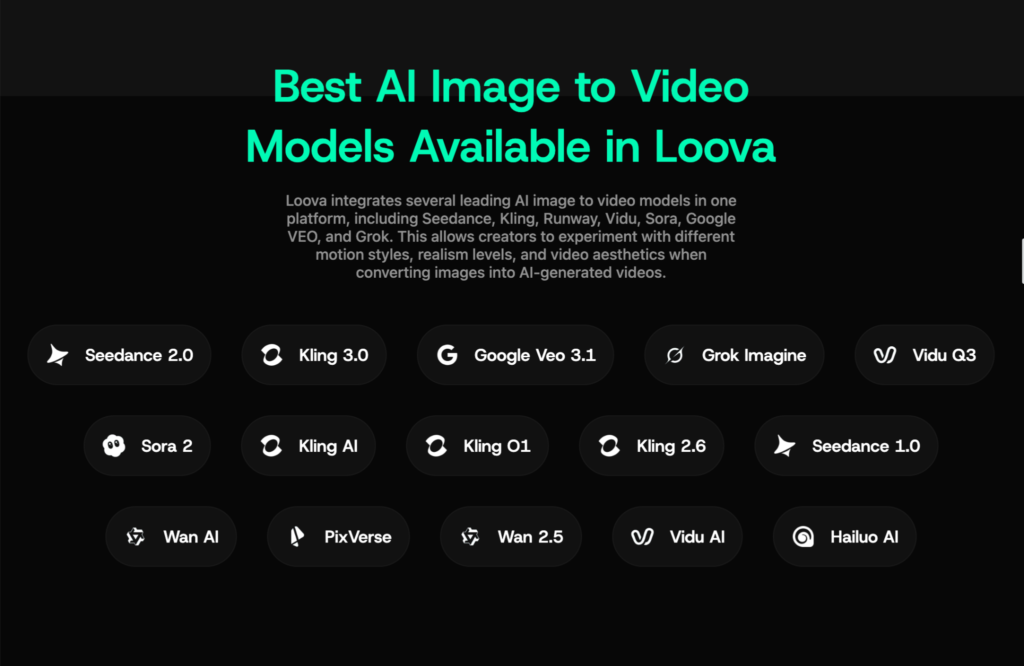
Platforms like Loova AI help streamline this workflow because creators can access multiple AI video models in one place.
Scaling For Small Creators
AI video reduces production barriers for smaller creators. A solo creator can now produce content that previously required a production team.
AI also improves creative testing. Instead of spending hours rebuilding the same concept, creators can quickly generate multiple variations and compare them. This allows smaller creators to compete more effectively in crowded social platforms.
The creators growing fastest today are often the ones with efficient production systems, not necessarily the biggest teams.
AI helps reduce the gap between small creators and larger influencer brands.
Step-by-Step AI Video Workflow For Creators
Most influencer AI workflows follow a similar structure.
First comes the idea. This may come from a trend, script, meme format, or content niche.
Next, creators generate scenes and visuals using AI video tools. Some creators use text to video workflows or image to video workflows to maintain character or visual consistency.
After generations, creators refine the video using AI editing tools.This may include: improving motion, adding transitions, adjusting pacing, refining scenes and adding captions.
Finally, the content is exported for TikTok, Instagram Reels, and YouTube Shorts.
Different AI models produce different results. Some models are better for realism. Some are stronger at cinematic motion. Others generate stylized visuals faster.
Because of this, creators increasingly use multiple AI models during production:
The issue is workflow fragmentation: switching between separate tools slows production and increases complexity.
This is why multi-model systems are becoming increasingly useful.
Loova AI integrates multiple AI video models into one workflow so creators can compare styles, refine outputs, and test ideas faster.
How Different Influencers Use AI Video
Influencers use AI video in different ways depending on their content style.
Short-form creators use AI for TikTok videos, Instagram Reels, and YouTube Shorts. AI helps generate visuals and speed up editing.
Faceless creators use talking avatar, AI-generated scenes, motion graphics, and cinematic visuals to create content without having to film themselves.
Lifestyle creators often use AI-generated B-roll and aesthetic visuals to improve storytelling.
Gaming creators use AI for stylized effects, animated sequences, and visual enhancements.
Many creators also use AI for sponsored content because it helps them produce ads faster without large production setups.
Common Mistakes Influencers Make When Using AI Video
AI video tools are powerful, but poor workflows still create weak content.
Generating generic visuals – weak prompts often lead to repetitive content that looks similar to other AI videos online.
Overusing effects – too many transitions and visual tricks can make videos feel distracting instead of engaging.
Poor storytelling – some creators focus too much on visuals and ignore storytelling. Good pacing, hooks, and structure still matter more than effects.
Workflow overload – using too many disconnected tools slows production instead of improving it. This is why integrated platforms are becoming more popular. Creators want fewer workflow interruptions and faster iteration.
The Future of AI Video for Influencers
AI video is becoming part of the standard creator workflow.
In the future, creators will likely automate more parts of production:
generating visual variations
adapting content for different platforms
testing multiple hooks
creating personalized content formats
This does not reduce creativity; it simply changes where creators allocate their time. Instead of spending hours on repetitive editing, creators can focus more on storytelling, strategy, and audience growth.
Loova AI is already moving toward this type of integrated creator workflow.
FAQs
How do influencers use AI video tools?
Influencers use AI tools for editing, video generation, visual effects, short-form content creation, and faster production workflows.
Can AI help influencers post more consistently?
Yes. AI reduces editing and production time, which helps creators publish content more regularly.
What are the best AI video tools for creators?
The best tools usually combine video generation, editing, and multiple AI models in one workflow.
Is AI video useful for TikTok and Instagram Reels?
Yes. AI video tools work especially well for short-form content because they support fast testing and rapid content production.
Why are creators using multiple AI video models?
Different AI models create different styles and strengths. Many creators combine models for realism, speed, and cinematic quality.
What is Loova AI?
Loova AI is an AI creative platform that integrates multiple AI video and image generation models into one workflow.
Finding the right clients within a particular geographic boundary requires a unique approach. Standard nationwide marketing campaigns fail to address neighborhood needs which require tailored methods to capture local attention. Strategic adjustments help small businesses connect with community members effectively.
Reaching nearby consumers means understanding community preferences. Local business owners face steep competition from major corporations. Embracing specialized online approaches level the playing field and keep local businesses relevant.
Target Hyperlocal Paid Advertising
Running geo-targeted ads prevents wasting money on audiences living too far away. Working with an agency like Savage Global Marketing allows local companies to set precise geographic perimeters around their storefronts. An advertising radius of 5 to 10 miles captures shoppers during peak buying moments.
Niche enterprises must track their ad spend metrics diligently to avoid waste. Monitoring cost-per-click statistics helps managers understand which platforms generate the best returns on every $1 spent.
Adjusting campaigns weekly keeps the advertising budget efficient and focused.
Reviewing analytics regularly helps to uncover new opportunities for local growth.
Optimize Your Google Business Profile
Buyers frequently check operational hours and location details before driving to a shop. Accurate listings prevent consumer frustration and build immediate corporate reliability. Regular updates guarantee that prospects receive correct information during their search.
Feedback from previous buyers heavily influences new consumer choices. 83% of buyers browse online reviews before choosing a neighborhood establishment. That same investigation showed 89% of those shoppers expect owners to reply to every single comment. Attentive business practices show public commitment to client satisfaction.
Answering critical remarks politely demonstrates excellent customer care to prospective buyers. Grateful responses to positive feedback show that a company appreciates its customer base. Consistent interaction keeps a listing fresh and prominent in search results.
Improve Conversion Rate Optimization
Driving traffic to a website means very little if visitors leave without making a purchase. Local sites must provide clear pathways for scheduling appointments or buying goods. Complicated checkout steps discourage users who want quick service. Direct navigation elements help users find exactly what they need.
Half of modern marketing professionals prioritize conversion rate optimization above other website modifications. Tweaking simple form fields keeps local buyers moving through the sales funnel.
Fast loading speeds prevent mobile users from hitting the back button. Most neighborhood searches occur on mobile devices when people travel. Clean designs satisfy hurried users looking for immediate contact details.
Integrate Generative Artificial Intelligence
Automating routine operations preserves valuable capital for companies in small markets. Emerging software programs assist with scheduling appointments and answering initial client inquiries. Small teams can manage larger client volumes using modern technical tools. Smart automation frees up hours for personalized customer care.
Software adoption rates continue to climb among independent operators. 58% of small companies employ generative software tools to streamline corporate tasks. Progressive businesses utilize these tools to handle repetitive messaging.
Implementing smart tools lets staff focus on high-value client interactions. Automated email sorting systems answer basic questions without human intervention. Modern applications make sophisticated data analysis accessible to small teams.
Leverage Targeted Social Proof
Showcasing actual outcomes builds immediate trust within a small community. Neighbors feel comfortable purchasing from an organization with a proven history of success nearby. Localized proof removes hesitation from the buying process.
Displaying distinct types of proof on a website makes a memorable impression. Different formats appeal to varied client preferences during the decision-making process.
Display several styles of evidence on landing pages:
Video clips of neighborhood clients sharing positive experiences
Photographic evidence of completed local construction projects
Written statements from recognizable community figures
Verifiable results eliminate doubts that quiet shoppers might harbor before a purchase. Local validation outweighs general corporate messaging.
Updating these success stories regularly shows continuous involvement in the region. Consistent documentation of satisfied clients reinforces market leadership.
Host Hyperlocal Community Events
Face-to-face interactions build rapport that standard online advertisements cannot replicate easily. Assembling community members creates strong brand awareness. Sponsoring a neighborhood gathering establishes an enterprise as a supportive fixture in the area. Real connections form the foundation of long-term commercial loyalty.
Educational workshops offer immense value to potential buyers in niche sectors. A local plumbing company might host a free home maintenance seminar. Teaching useful skills positions the business as a helpful authority before a crisis occurs. Participants remember generous experts when they require professional assistance later.
Distributing branded items during gatherings keeps a business top of mind. People remember companies that contribute positively to regional charity efforts. Active participation in neighborhood affairs provides a steady stream of word-of-mouth referrals. Supporting local causes generates genuine goodwill across the entire township.
Succeeding in restricted geographical markets requires a dedication to local relationship building. Combining personalized web tools with authentic regional outreach yields excellent long-term results. Businesses that serve their immediate neighborhoods thoughtfully achieve sustainable growth. Dedication to community needs guarantees a lasting position in the local marketplace.
Content marketing return on investment (ROI) accurately indicates whether your content marketing efforts are helping you meet your goals. For this reason, understanding how to measure content marketing ROI is crucial to your strategy. To evaluate your content marketing strategy, you need to understand what metrics go into the ROI.
What Is Content Marketing Return on Investment (ROI)?
Content marketing ROI is a percentage that shows the revenue you gain from marketing your content compared to what you spend. You’re doing something right if you earn more income than you spend. However, you must identify and fix the problem if you pay more than you earn.
Why Do You Need to Measure Content Marketing ROI?
Content marketing ROI helps you decide and improve your content marketing strategy. Once you learn how to measure your ROI, it can help you in the following ways:
Your content marketing ROI helps you gauge the effectiveness of your content marketing strategy. Measuring your ROI gives you a good idea of what you need to do to increase your leads, retention, SEO, and authority in the future.
You can also compare your content marketing ROI from one duration to the content marketing ROI from another. This gives you a good idea of whether one content marketing strategy is more effective than another one. These insights can also guide the development of stronger customer retention strategies to improve long-term engagement and loyalty.
How to Measure Content Marketing ROI
Content marketing aims to help you connect better with your audience. However, you cannot simply measure the outcome of your content marketing qualitatively. You also need to do quantitative measurements.
You can measure your content marketing return on investment in many ways. However, a standard formula can help you quickly calculate your content marketing ROI.
To arrive at a figure for your return on investment, do the following:
Calculate how much you spent on distributing the same piece of content.
Calculate the total sales that particular piece of content generated.
Once you have the above information, all you need to do is plug the figures into this equation:
((Return – Investment)/ Investment) x 100 = Content marketing ROI
You know you’re doing something right if your spending is less than your earnings. However, if you’re losing money, you must return to the drawing board and fix your strategy.
7 Metrics for Measuring Content Marketing ROI
If you want a quantitative measure of your content marketing return on investment, focus on 7 key metrics. We’ve divided these metrics into categories depending on what aspect of your content marketing outcomes you want to analyze. We’ve also provided instructions on how to do some of these calculations in Google Analytics.
Does Your Content Marketing Have High Earnings Potential?
Measuring the earnings potential of your content can help you determine whether your content is good enough to bring in money from your leads. Is your content appealing enough to convince a lead to become a paying customer? To gauge the earnings potential of your content marketing, here’s what you need to measure:
1) Lead Quality
Are you getting a high enough number of leads to your website? More importantly, are they visiting the critical pages?
It’s essential to go beyond ensuring you have leads—you’re getting high-quality leads. A high-quality lead has a high potential for converting into a paying customer.
A Promising lead will find themselves on your landing page from wherever your content has brought them. Once they land, they will check your prices or consult a customer care representative for more information about your product.
You can set up a goal in Google Analytics to measure the quality of your leads.
How to find this in Google Analytics:
Conversions >>> Goals >>> Funnel visualization
2) Sales Figures
How many of your initial leads turn into actual sales? Comparing your sales with your leads will give you a good idea of how effective your sales funnel is.
How to find this in Google Analytics:
If you’ve enabled the eCommerce feature on Google Analytics, here’s how to find your sales:
Behavior >>> Site content >>> All pages
Many of your leads won’t convert into paying customers immediately. On the contrary, they will probably look around and wander off, only to return to buy your product another day. Sometimes, you remain at the top of your mind even after someone leaves, and they find they can’t resist your offer.
Alternatively, they might see another piece of content from your brand that reminds them of the products they left behind on your website. Either way, paying attention to how these leads eventually convert to sales is essential. Additionally, exploring Clickfunnels alternatives can help you identify more effective ways to capture and nurture these leads throughout their journey.
You can find this information efficiently if you’ve set up Google Analytics.
You can also compare this data between different periods. This comparison will help you gauge your most compelling content pieces.
Is Your Content Marketing Generating Engagement?
Producing quality content is not enough. You need to know that your content matters to people. If people interact with your content and navigate from one piece to another, you know they find it useful.
On the other hand, if people leave as soon as they view one piece of content, you can conclude they’re bored. If so, you must revamp your content to address your audience’s needs.
3) Web Traffic
Measuring web traffic is an essential part of evaluating the success of your content marketing strategy. However, some brands celebrate high web traffic without realizing that web traffic can tell you very little about their content marketing.
Since web traffic can become a distracting vanity metric, combining it with other metrics is essential. For example, you could combine web traffic with lead quality and sales. After all, just because someone visits your website doesn’t guarantee they will become customers.
When measuring web traffic, looking at how it grows over time is essential. It’s equally important to focus on referral traffic. This will give you a good idea of which channels most of your leads come from. This information lets you see what part of your content marketing strategy drives the most traffic. You will also know what areas of your plan waste your time.
You can measure your web traffic easily with a Google Analytics profile.
How to find this in Google Analytics:
Behavior >>> Site content >>> Landing pages
This will show you where your web visitors land when visiting your website. Google Analytics lists these pages, ranging from the ones with the highest traffic to the ones with the lowest.
If you want to study your referral traffic, you can also do this in Google Analytics.
You should pair web traffic with onsite engagement to see how people engage with your content once they land on your website. After all, if people immediately bounce away, then you can’t count that as meaningful web traffic.
Google Analytics tracks specific engagement metrics, such as the number of pages viewed per session, average session duration, and bounce rate.
How to find this in Google Analytics:
Audience >>> Overview
You can also study the engagement on each page of your website. This can give you an idea of which pages are more valuable to your web visitors.
How to find this in Google Analytics:
Behavior >>> Site content >>> All pages
5) Social Media Leads
Paying attention to your social media leads will give you a good idea of which channels attract more people. This can help you refine your social media outreach strategy to appeal to more people across all your channels.
How to find this in Google Analytics:
Acquisition >>> Social >>> Network Referrals
Beyond studying your social media leads, you can get an overview of how much revenue is coming from your social media.
How to find this in Google Analytics:
Acquisition >>> Social >>> Overview
In addition, you should monitor engagement metrics directly on your social media channels. For example, track shares, retweets, and likes. More importantly, pay attention to the comments you receive on your posts.
Engage with commenters and use social media analytics tools to build positive relationships with your audience while gaining deeper performance insights.
If you get disappointing engagement metrics, you and your team must figure out what part of your content marketing strategy isn’t working.
Does Your Content Rank High in SERPS?
If your content ranks high in search engine results pages (SERPs), you’ve optimized it well. A high ranking also means that search engines and people find your content valuable. After all, Google ranks the results with high SEO, and those people often click on higher after a while.
6) SEO Ranking
You can do several things to measure your SEO ranking.
Check whether you’re in the top 3 results in Google for your keywords. After all, most people only click on the top 3 results.
7) Online and Offline Authority
Most of the metrics we’ve already covered are directly related to the performance of your website. However, people’s perception of you as a thought leader can also give you an idea of how well your content is doing.
Ultimately, you can’t assign a figure to your authority online and offline. Authority is more about the sentiment surrounding your brand. You have high authority if people rely on you for advice and quality products and services.
To measure online authority, you need to engage in social listening. That way, you can answer the following questions.
Do you get positive media coverage from respected online media outlets?
Are people sharing your products and services with their online networks?
Are you getting positive reviews online?
Is your brand being mentioned in positive contexts?
Similarly, to understand your offline authority, pay attention to how people interact with you offline.
Are thought leaders inviting you to industry events?
Do journalists, bloggers, and influencers contact you for quotes and insights?
Have you received invitations to collaborate with other brands?
Do you get positive media coverage from respected offline media outlets such as newspapers, magazines, and radio?
Over to you:
While all these metrics are essential, you don’t have to use them simultaneously. To get meaningful results, you shouldn’t use them all simultaneously.
Instead, you should set a content marketing goal and pick the metric that will help you assess that goal. For example, for a particular month, you might aim to increase the engagement your content generates.
In this case, evaluating your website engagement and social media leads for that month would make sense. Once you have these figures, you can compare them with the previous month’s results and see what needs to be changed.
Measuring your content marketing ROI is essential to your content marketing strategy. After all, once you’ve implemented any plan, you must measure the results. With these 7 metrics, you will be well on your way to identifying which elements of your strategy are working and which need tweaking.
In a world where millions of conversations happen online every minute, understanding your audience is no longer optional,it’s a competitive advantage.
Social listening helps brands track, analyze, and act on what people are saying online. Done right, it fuels better content, stronger SEO, and smarter business decisions.
If you want to create content that actually resonates (and ranks), you need the right tools.
Let’s dive into the top social listening tools in 2026, starting with one of the most powerful all-in-one platforms.
Understanding crafting a captivating headline is crucial for creating compelling content that resonates with your audience. Your headline serves as the initial engagement point for readers, drawing them into your writing. It’s pivotal to grasp the essence of composing a headline that grabs attention and piques curiosity, compelling readers to delve deeper into your article.
Whether you’re penning a blog post, an eBook, or a white paper, a well-crafted headline can increase your content’s traffic. Conversely, a lackluster headline may prompt visitors to swiftly navigate away from your page in search of more enticing material.
As evident, the headline stands as a cornerstone of any written piece you produce. The encouraging news is that, with practice, you can master crafting engaging headlines that enhance clicks and draw in more interested readers.
Examples of Winning Headlines
In our quest for the perfect headline, we came across 5 categories of headlines that tend to perform well:
Making a promise
For example: “Do your Business Accounts Faster with this Simple Formula.”
For example: “This is the Best Diet for your Dog, According to Veterinarians.”
Asking a question
For example: “Have you Heard what Carrots can Do for your Skin?”
Disputing common knowledge
For example: “Here’s why Drinking Milk is Bad for You.”
Before we move on, all the above headlines are purely hypothetical. We don’t believe milk is terrible for you, so don’t quote us.
How to Write a Headline That Will Capture Attention
1) Do Your Research
You must first know what you’re writing about to write an engaging headline. Your topic should appeal to readers, so knowing what they want is essential.
Before crafting your headline, consider doing some preliminary research to understand your target audience’s pain points. Understanding their needs better will guide you in writing a headline that resonates with them.
Kick off your research by exploring what prompts people to turn to Google. What specific queries do they type when seeking assistance in your niche? By analyzing prevalent keywords, you can uncover the topics your audience is eager to explore.
Feeling lost? Start typing your chosen keyword into Google’s search bar and observe the suggestions before hitting “search.”
For example, here’s what appears when I use “DIY Decor” as a search term. As you can see, this search term is not as popular as in November. You can also see that Google Trends has suggested some related search terms, which I can compare with my original search term.
“DIY Ghost Decor” is an even less popular search term than “DIY Decor” right now. This is valid since this search term would’ve been popular around Halloween, not in the middle of March. Let’s try one more.
As expected, “Easter Decor” far outperforms “DIY Decor” as a search term at this point in the year. So, writing about Easter decor would be a great idea if you were a company that sells home decor accessories and runs a blog. As before, Google Trends has listed related search queries and their popularity. These queries can help you refine your headline to make it more focused.
For this reason, keeping your headline to 6 words long makes it easy to digest. If you need to write more than 6 words, you shouldn’t exceed 10 words. If you write those 10 words, you must make the first and last 3 words good because they will have the most impact.
Likewise, your headline should be 50-60 characters long. Packing too many characters into your headline will make it chopped in SERPs. Few people will click on your search result if your headline is incomplete.
3) Brainstorm a Selection of Headlines
Crafting the perfect headline isn’t an instant task; it requires patience and time. Rather than hastily settling on the first headline that comes to mind, it’s crucial to give yourself room to explore. Take a moment to brainstorm at least three different headlines, allowing yourself to uncover the one that truly captivates.
Some well-known blogs, such as Upworthy, go even further by generating a whopping 25 headlines. While it might seem excessive, this method increases the chances of discovering a gem. Once you’ve compiled your list, begin the process of elimination, discarding those that don’t quite hit the mark. With this approach, selecting the winning headline becomes straightforward, setting the stage for success.
4) Get to the Point
A good headline gets straight to the point rather than beating about the bush. Many brands make the mistake of crafting vague headlines because they believe the mystery will draw readers in. On the contrary, readers who can’t make heads or tails of what your article is about are unlikely to stick around and find out.
Be direct so that people can see the value in your article immediately. Including keywords in your headline is one way to immediately communicate value to your reader.
5) Size Your Headline to Stand Out
When you want your headline to grab attention, make sure it’s in a larger font than the rest of your text. It sounds like a no-brainer, but it’s easy to overlook details like font size when rushing to meet a deadline.
Luckily, many content editors come with pre-set heading sizes that you can apply. If yours doesn’t have this feature, adjust the size manually to ensure your headline gets the attention it deserves.
6) Use Visually Impactful Alignment
The way you align your headline also determines how prominent it is to the reader’s eye. Centering your headline will have the most impact, while a left-aligned headline seems more formal. Whatever you do, don’t justify your headline, as this leads to imbalanced spacing.
7) Write for SEO
When writing your headline, it would be best to appeal to human readers and search engines. Search engines also “read” your article to categorize it properly. For this reason, you need to optimize your headline to help the search engines understand your content.
As you’re writing for SEO, including the keyword in the title is essential. Moreover, you should include it as close to the beginning as possible. Ensure your headline makes logical sense, as you’re also trying to attract human readers.
Including your keyword in the headline will help search engines understand and include your article in the correct SERPs.
8) Use “You”
Addressing your reader directly is a good strategy if you want your headline to grab their attention. Instead of speaking abstractly, say “you.” For example, in the titles we listed previously, we said “Do your Business Accounts Faster,” when we could just as quickly have said “Do Business Accounts Faster.”
Adding the extra word – “you” – is worth it because it helps you develop a more personal headline that will stand out in SERPs.
9) Highlight the Value
Regardless of the headline style you choose, it’s essential to highlight the value you’re offering the reader. This is an excellent way to convince them that your article is worth reading.
You can do this by discussing a problem that your article solves. For example, you could mention “The Best Way to ABCD.” You can also present your headline as advice or mention interesting research data within your article. Finally, you can promise to teach the reader something useful.
10) Use Statistics
Including statistics in your headline will pique your reader’s curiosity, especially if it’s a surprising statistic. Include the figures as close to the beginning of your headline as possible so that it grabs a reader’s attention right away.
11) Use Numbers
Our brains are attracted to numbers, so adding numbers to the beginning of your headline is a surefire way to stop someone in their tracks. Numbers are especially effective if you are writing a “how-to” article. Remember to use digits instead of words to help your numbers stand out more.
12) Avoid Clickbait
As a content creator, the last thing you want is to earn a reputation for being pretentious or making exaggerated claims. This is precisely what clickbait will do to you, so steer clear.
All a reader needs to do is click on your grandiose headline, only to discover that you’ve misled them with clickbait. This kind of dishonesty will cost you a reader’s trust. This person is unlikely to click on any of your headlines in the future, no matter how interesting they seem.
13) Use Interesting Words
Headlines containing “X Tips for ABCD” are a dime a dozen. Instead of promising your reader some tips, use a less common word. For example, you can offer “X Secrets for ABCD” or “X Reasons to ABCD.”
Less commonly used words will help you stand out from the crowd.
14) Check Your Competitors Out
You shouldn’t settle on a headline before you’ve checked your competitors out and seen what kind of headlines they’re using for your chosen topic. Having an idea of what your competitors are doing will give you a good idea of how to write a headline that stands out.
15) Do A/B Testing
There is no single magical solution to writing headlines that stand out. Ultimately, it would be best to experiment with several strategies until you find one that works for your audience.
You can test your headlines in two ways:
a) Twitter
Once you’ve published your article, you can choose your two most potent headlines. Use them separately to promote your article and see which headline gets more clicks.
b) Email Marketing
Again, once your article is published, please send it to your mailing list using both headlines. Divide the people on your mailing list by half, and send the article to those people using one headline. Send the other half of your mailing list the other headline. Whichever headline gets more engagement should give you an idea of how to craft your headlines in the future. That’s email marketing made easy.
As you can see, learning how to write a headline that will stop people in their tracks is an essential part of content marketing for your brand. Follow the tips above and quickly write outstanding headlines.
Knowing the best time to publish a blog post can help you reach more people and boost your engagement whenever you publish a new post.
What is the best time for your new blog post?
Many bloggers prefer to publish their posts at a time when everyone is online. Similarly, some bloggers publish affiliate marketing content when their audience has time to engage with their content and share it with friends. How do you determine what these times are?
The good news is that many brands have already researched this. The bad news is that the results are very conflicting.
For example, consider the recommended time to publish a new blog post to earn social shares.
1. The Best Time to Publish for Social Shares
When they researched the best day to publish posts to enjoy high social shares, TrackMaven found that Sunday works best. In contrast, Backlinko and BuzzSumo found no difference in the number of social shares across the week’s days.
If you’re already confused, prepare to get even more confused. The answer to the best time to publish a blog post for social shares is even more complex.
TrackMaven recommends publishing at 3 p.m., but Shareaholic recommends 9–10 a.m. Furthermore, Shareaholic outlines 9 a.m. to 5 p.m. as the peak time for social shares.
Researchers have also recommended publishing your blog post at other times, depending on your end goal. Consider these times when determining the best time to publish a blog post.
In particular, Shareaholic, BuzzSumo, and Kissmetrics have recommended the best time to publish if you want to attract high traffic, a high volume of comments, and high authority backlinks.
2. The Best Time to Publish for Traffic
According to Kissmetrics and Neil Patel, the best time to publish if you want many page views is Monday at 11 a.m. Similarly, Shareaholic has recommended Monday at 9 a.m.
3. The Best Time to Publish for Comments
According to research by Kissmetrics, the best time to publish your blog post is Saturday at 9 a.m. EST if you want high engagement.
4. The Best Time to Publish for Backlinks
Kissmetrics also recommends publishing your blog post early on Monday or Thursday morning if you want to attract backlinks. According to their study, you can earn these backlinks as early as 7 a.m. EST.
What Is Truly the Best Time to Publish a Blog Post?
As you can see, if you pay attention to all the research, your head will spin before determining the best time to publish a blog post.
Here at Kontely, we like to present confusing data in infographics or graphs to make it easier to understand. However, these recommendations are too contradictory for us to simplify, even with the magic of an infographic.
We aren’t going to put all this contradictory information in one place. However, the least we can do is find some common elements in these research results. From what we can see, it seems that:
Monday morning between 9 a.m. and 11 a.m. is an excellent time to publish if you want to attract traffic
9 a.m. to 5 p.m. is the peak time for generating social shares
Off-peak times like weekends are the best time to publish if you wish to high engagement
80% of blog readers read blog posts in the morning
Conversely, 60% of men will read a blog post in the evening compared to 50% of women
In other words, Zarrella believes that if your target audience is men, you will have more page views in the evening.
This might seem like a simple solution to our problem. However, you can’t just slot these times into your blog editorial calendar without trial and error to determine if they work for your brand.
The Best Time to Publish a Blog Post for Your Brand
The optimal time prescribed by one researcher may not work for your brand, industry, or target audience.
So, instead of trying to arrive at one magical answer to this question, we’d like to help you figure out the best time to publish a blog post specifically for your brand. To do this, we’d like to shift your focus.
We won’t consider the answer to this question as a single optimal time. Instead, let’s admit that there are many ways to optimize the timing of your blog posts. How do you optimize this timing?
1. Publish Consistently
Nailing the timing might be a big deal to you. Even so, publishing blog posts consistently is far more critical than publishing them at the right time. If you publish consistently, then you can also:
2. Build Trust
Blogging consistently builds trust with your target audience, who slowly rely on you as a source of valuable information.
Once your readers know that you publish on specific days or several times a week, they will start coming to you to check out your new pieces. This will happen even when you haven’t told them there is a new blog post. Reading your blog will become a natural part of their daily or weekly routine.
Blogging consistently is also good for your SEO ranking on Google. If you’re committed to posting consistently, then Google will recognize you as a source of consistent information. As a result, you will rank higher in the search results when someone searches for a topic you’ve written about.
4. Build Brand Awareness
By improving your SEO ranking on Google, you also improve the chances of people stumbling upon your blog. If more people stumble upon your blog, then more people will know who your brand is.
So, what does it mean to post consistently?
According to a study by HubSpot, brands that publish 16 (or more) times each month get 3.5 times more traffic than those that publish 0 to 4 times monthly. That translates to 4 posts each week.
However, it’s essential to consider your team size before you commit to this blogging schedule. It might be unrealistic for one person to write four blog posts each week if they also have other responsibilities.
If you have several content creators, it’s easy to divide those 16 blog posts among them. However, most brands only have one blogger. In this case, 2-3 blog posts a week might be a more bearable workload for them.
Remember, quality is always better than quantity. Writing two or three excellent blog posts is better than writing four sloppy ones.
If you want to publish 16 blog posts a week but have a small team, then guest posting is a good option.
5. Post Time-sensitive Articles Immediately
Sometimes, you have a time-sensitive article to publish. For example, you could have written a review of the newest iPhone or a blog post related to recent news.
You can’t wait for a prescribed time to arrive before publishing your blog post. If you do that, you risk losing readers to competitors who’ve published their content before you. By the time you publish your blog post, your target audience will have gotten their information elsewhere.
If your blog article contains breaking news, you should publish it immediately. This will help you engage your audience while they’re still interested.
6. Profile Your Target Audience
Do you work in the B2B industry? If so, publish as many weekly blog posts as possible.
A B2B target audience will engage more with your content during the week. This is when they’re looking for solutions to their business problems, so you should capitalize on this time.
You should take time to develop a B2B content marketing strategy to effectively convert this B2B crowd into paying clients.
7. Pay Attention to Changing Seasons
Changing seasons affect the type of content your target audience wants to read. For example, people devour blog posts about vacations and travel during the summer. Similarly, people will look for more educational material if there’s a massive conference in your industry.
In the same way, people will be more open to informative content during the week. On the other hand, they will want more entertaining content when trying to relax at the end of the week.
8. Find Out What Works for You
Above all, you need to find out what timing works best for you to optimize the timing of your blog posts.
Relying on the peak times recommended by Kissmetrics and BuzzSumo is a good idea. On the one hand, adopting these times will help you reach large audiences. On the other hand, you’ll be competing with hundreds of different brands who are publishing at the same time.
In other words, if you publish during peak times, your content might be drowned out by all your competitors. Ultimately, your target audience might never see your blog posts if this happens.
For this reason, it’s essential to figure out what works for your brand. You can do this in one of two ways:
Alternatively, you can measure your website traffic first, then determine what times will work best in the future.
11. Prioritize The Time You Share
The time when you share your blog post on social media is more critical than when you publish. Different social media platforms have different recommended times for posting. However, finding out what works for your social media audience is still essential.
What Is the Best Time to Publish a Blog Post for My Brand?
As you can see, there is no one answer to this question. Many factors, including the content of your blog post, your target audience, and your industry, will influence the best time to publish your blog post.
Instead of trying to find one magical time, it’s better to find out how to optimize the timing of your blog posts. With the tips above, you’ll find many optimal times for publishing posts in the future.